Overview
The Demo Floating Button adds a clickable call to action across all screens in a template.
This gives viewers a clear next step while they are exploring the demo, whether that means opening a lead form, visiting an external page, booking time, or moving into another resource.
- You can only have one Demo Floating Button per template.
- The button color uses the accent color defined in your guide style settings.
Why teams use it: The Demo Floating Button helps turn passive viewing into action by giving viewers an always-available next step without forcing them to leave the experience too early.
For more ways to add interactivity with guides, see Create Guided Demos.
In This Guide:
This guide covers how to enable the Demo Floating Button, configure its behavior, and add more context to its destination link.
Open the Demo Floating Button Settings
The Demo Floating Button is managed from the Guides settings panel inside the template editor.
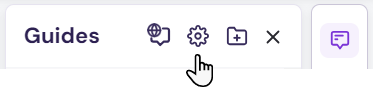
- From the right-hand toolbar, click the Guides icon. This opens the Guides pane. Then click the gear icon to open the available settings.
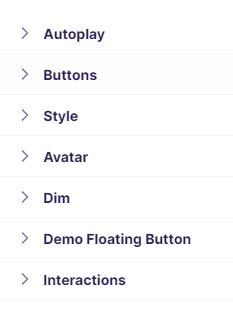
- Select Demo Floating Button.
Activate the Demo Floating Button

Once you open the settings, you can enable the button and define the action viewers should take.
- Set the Enabled toggle to ON.
- Enter the call-to-action text and add the destination link, such as a lead form or external URL.
- Choose the position where the button should appear on screen.
- Click Done. The floating button will now appear across all demo screens in that template.
Best practice: Keep the CTA action-focused and specific. Buttons like Book Time, Talk to Sales, Start Trial, or View Pricing are usually more effective than generic labels.
To add lead forms to a demo, see Embedding Lead Forms.
Add Context to the Button Link with URL Parameters
You can make the Demo Floating Button more powerful by adding URL parameters to its destination link.
This makes it possible to pass helpful context into the next step, such as campaign source, or other tracking values.
It is especially useful when the button links to a lead form, booking page, follow-up workflow, or external landing page that should reflect more context from the demo experience.
Why this matters: URL parameters can help prefill forms, personalize follow-up experiences, support attribution tracking, and connect demo engagement more clearly to downstream workflows.
For example, you might use URL parameters to pass:
- Campaign or UTM source
- Custom identifiers for routing or reporting
- Demo name
- Demo ID
Learn more in Track and Identify Viewers with URL Parameters (Email, UTM, and Custom).
Summary
The Demo Floating Button gives you a simple way to add a persistent call to action across the full demo experience.
It works best when the next step is clear, relevant to the story you are telling, and easy for the viewer to act on without breaking momentum.
Adding URL parameters makes that next step even stronger by carrying useful context into forms, booking flows, and follow-up destinations.
The best floating buttons do more than send viewers somewhere. They move the story forward with a clear, well-timed next step.