Connect to Marketo
Connect to Marketo
Overview
Integrating Walnut with Marketo lets you seamlessly incorporate demo engagement data into your marketing and sales workflows — giving your team a richer, more actionable view of how prospects interact with your demos.
The Marketo Integration — outlined in this setup guide — enriches identified demo and playlist sessions for both new and existing leads, adding detailed engagement data such as views, completions, and session-level insights.
The Marketo integration supports multiple primary identification methods, including Marketo lead forms, Walnut email gates, or URL parameters.
Key features of this integration include:
- Automatic lead enrichment — Demo and playlist session data (e.g., views, duration, activity) are synced to lead records under Person and Custom attributes.
- Flexible lead capture — Embed Marketo forms directly in demos or use Walnut’s built-in email gates to generate new leads.
- Full-funnel visibility — Sync engagement data with existing leads for a complete view of how prospects interact with your demos across the buyer journey.
Before You Start
Before proceeding with the Walnut <> Marketo Integration setup, please ensure the following:
-
API User Permissions & Setup
Confirm that the correct Marketo API user is assigned when setting up the new service in:Walnut → Integrations → Marketo → AuthenticateThe API user must have the following permissions enabled:
- Read-Write Activity
- Read-Write Activity Metadata
- Read-Write Person
- Read-Write Schema Custom Field
- Read-Write Schema Standard Field
-
Custom Activity Availability
Make sure your Marketo instance has at least one (1) available custom activity slot while the integration is active. This is required for the integration to function properly.
Authenticate Your Marketo Account
Follow these steps to connect Walnut to your Marketo environment and enable data syncing.
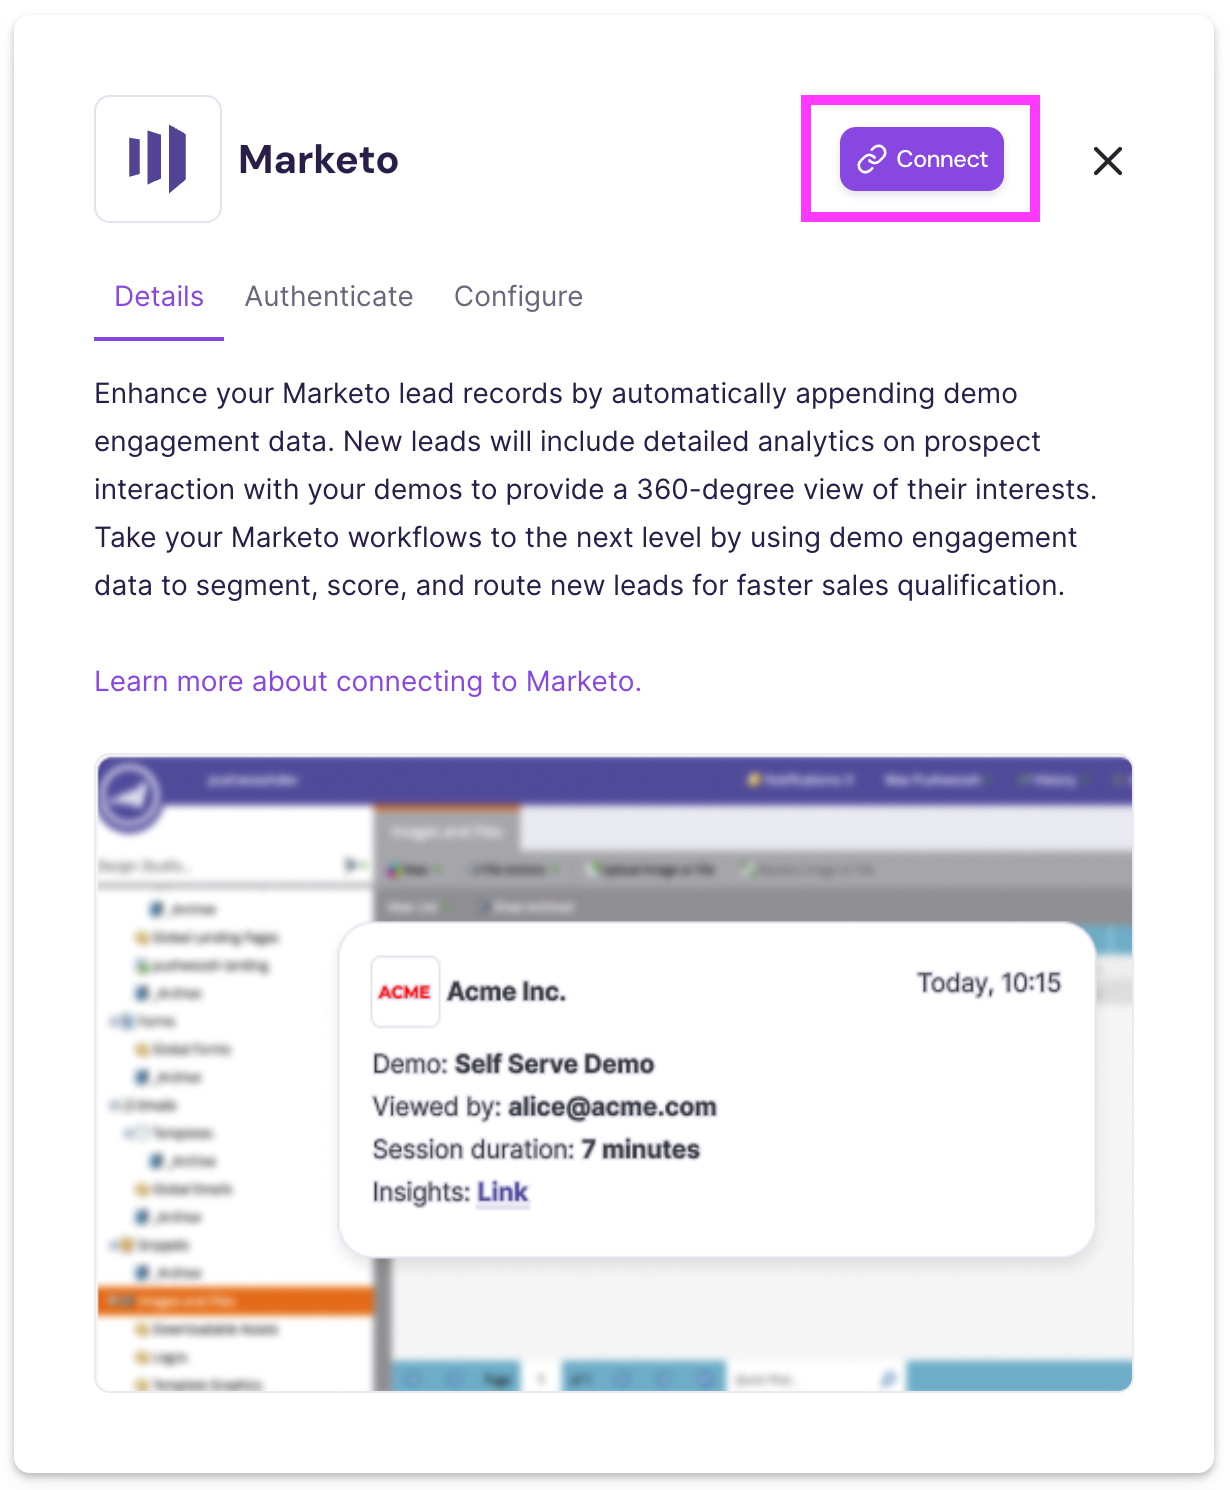
Step 1: Connect to Marketo
- From the Integrations page in Walnut, find Marketo and click Learn more.
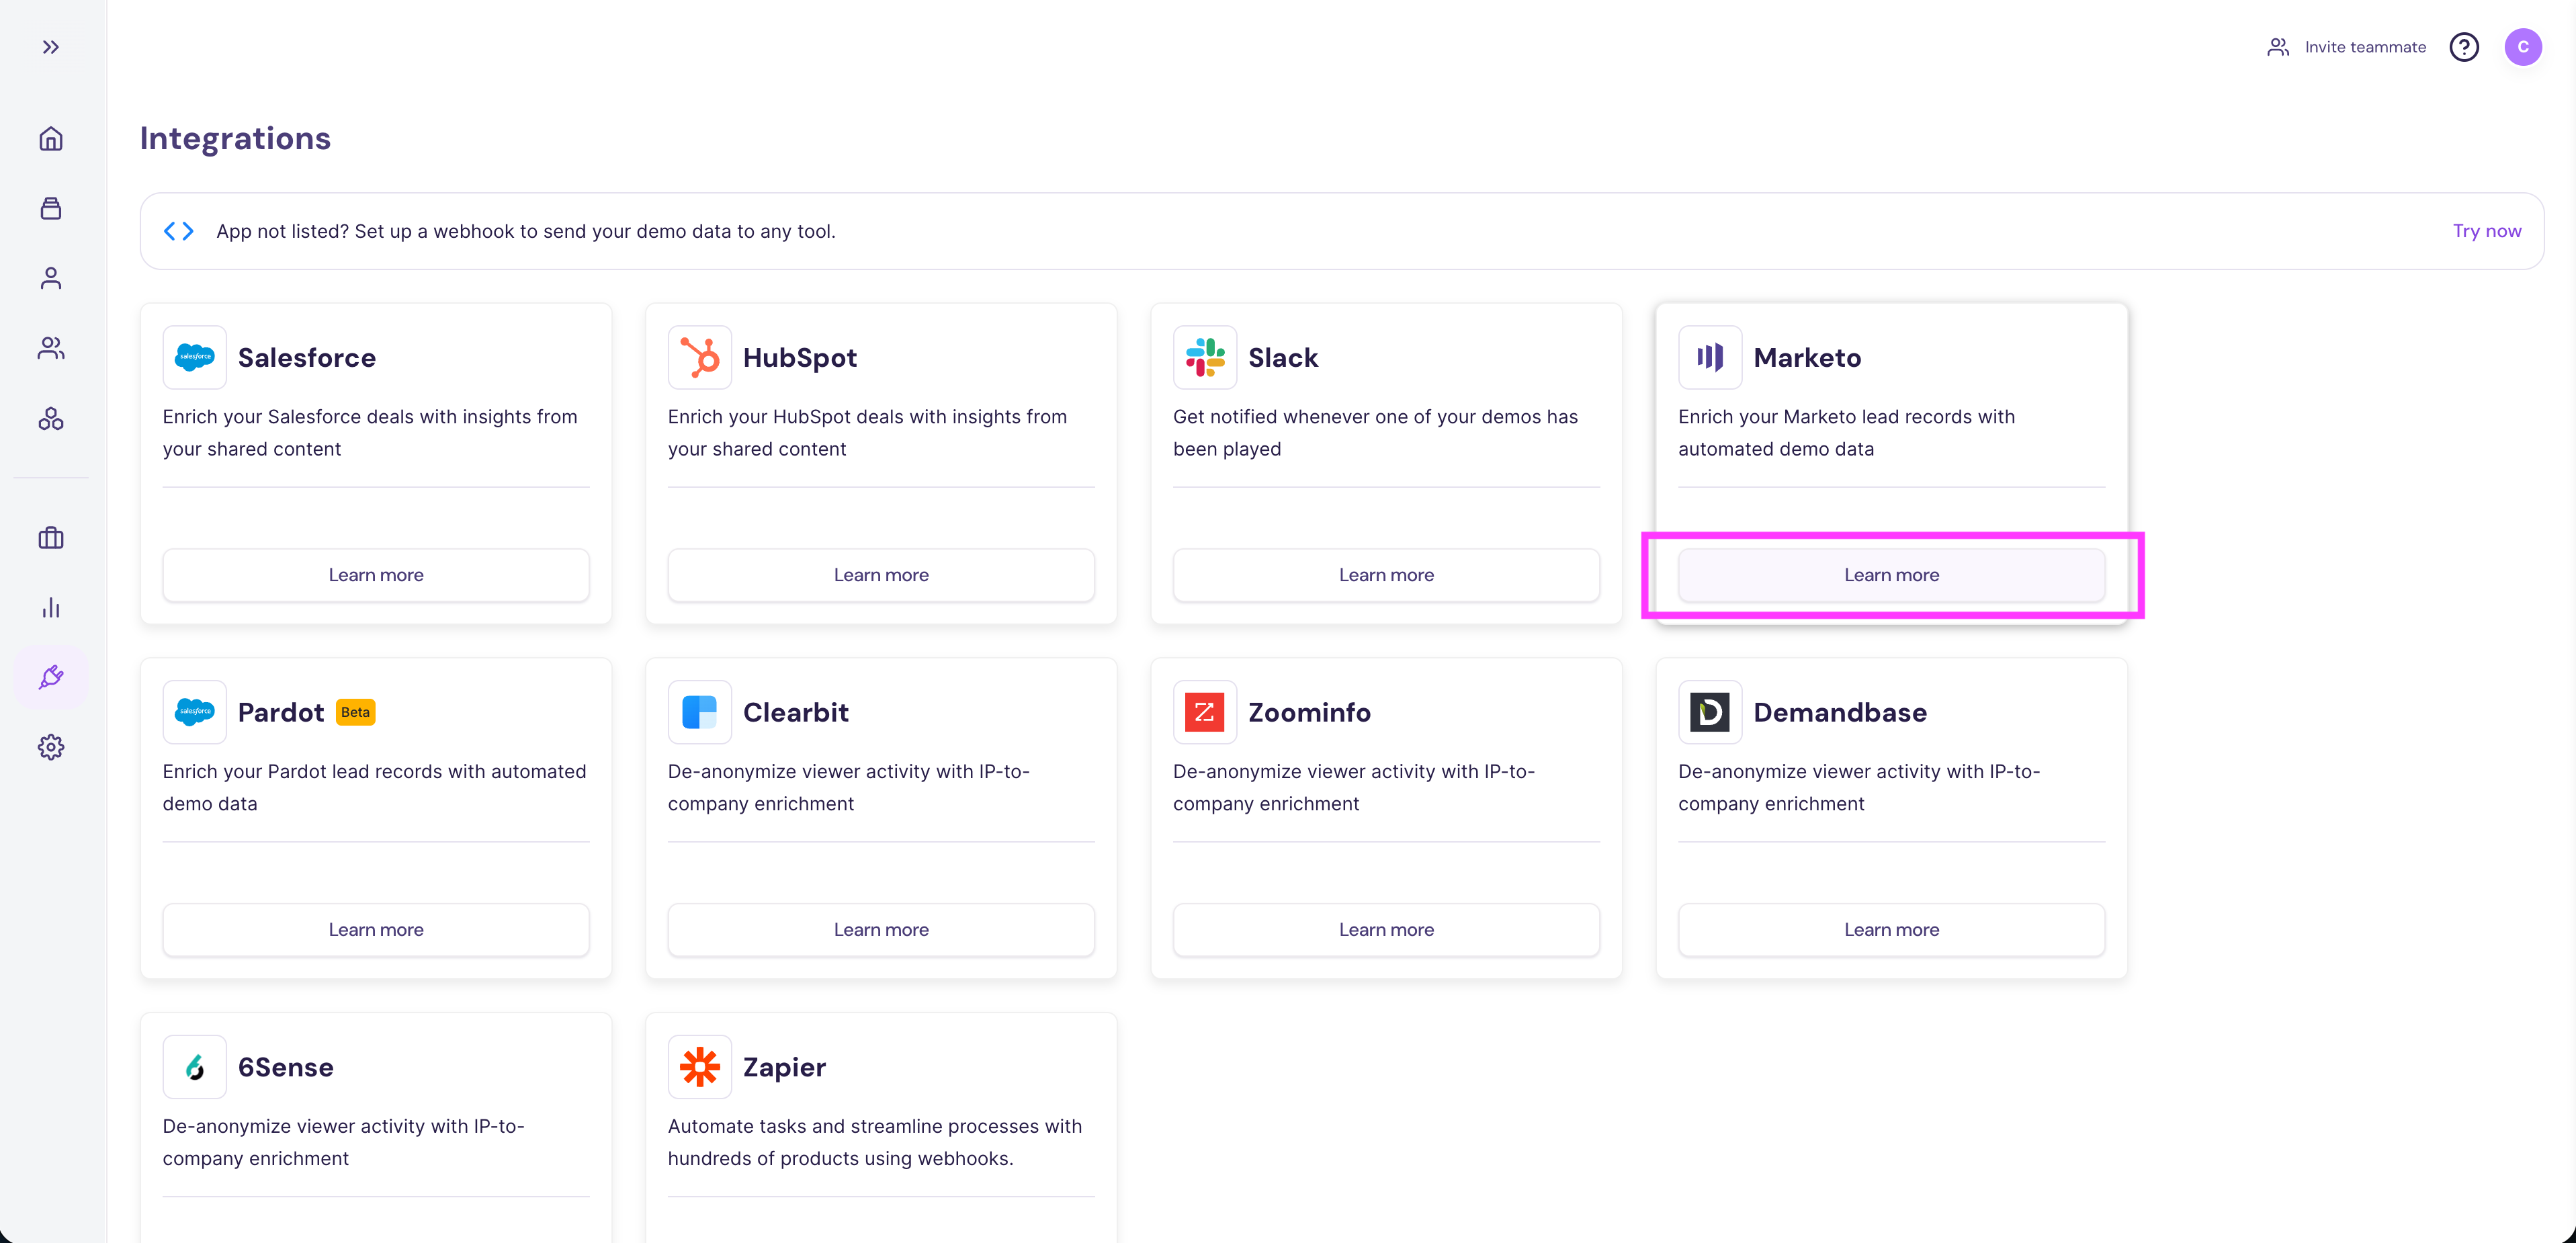
- Click Connect within the modal. This opens the Marketo authentication window.
Step 2: Create a New Authentication
Click New authentication, then enter the following details:
- Your authentication name — for example, Crunchy AI’s Marketo account.
- API endpoint domain* — your Marketo REST domain (see note below).
- Client ID* — from your Marketo Admin → LaunchPoint → View Details.
- Client Secret* — from the same LaunchPoint details view.
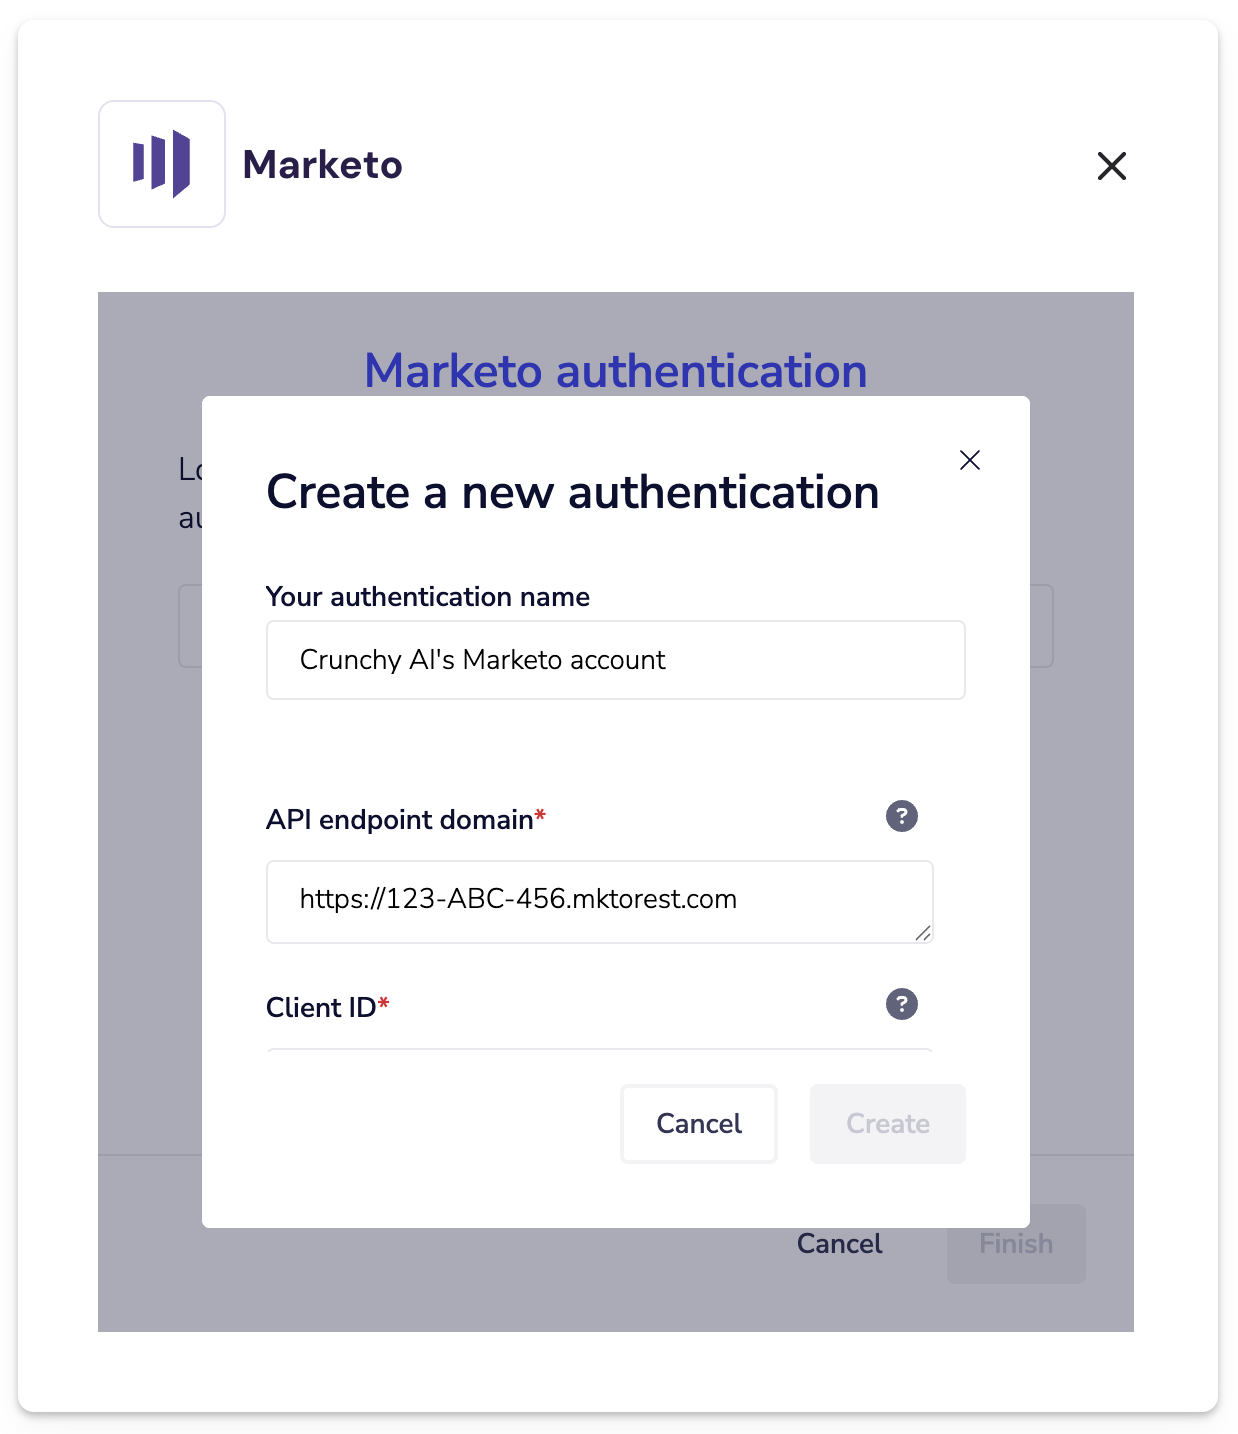
- Once all fields are complete, click Create, then Finish to complete authentication. You’ll see a confirmation once your Marketo connection is active.
- Next, proceed to the Configure tab to set up your optional configurations: Generate Leads Directly From Demos and Handle Bounced Sessions.
Test Your Marketo Integration
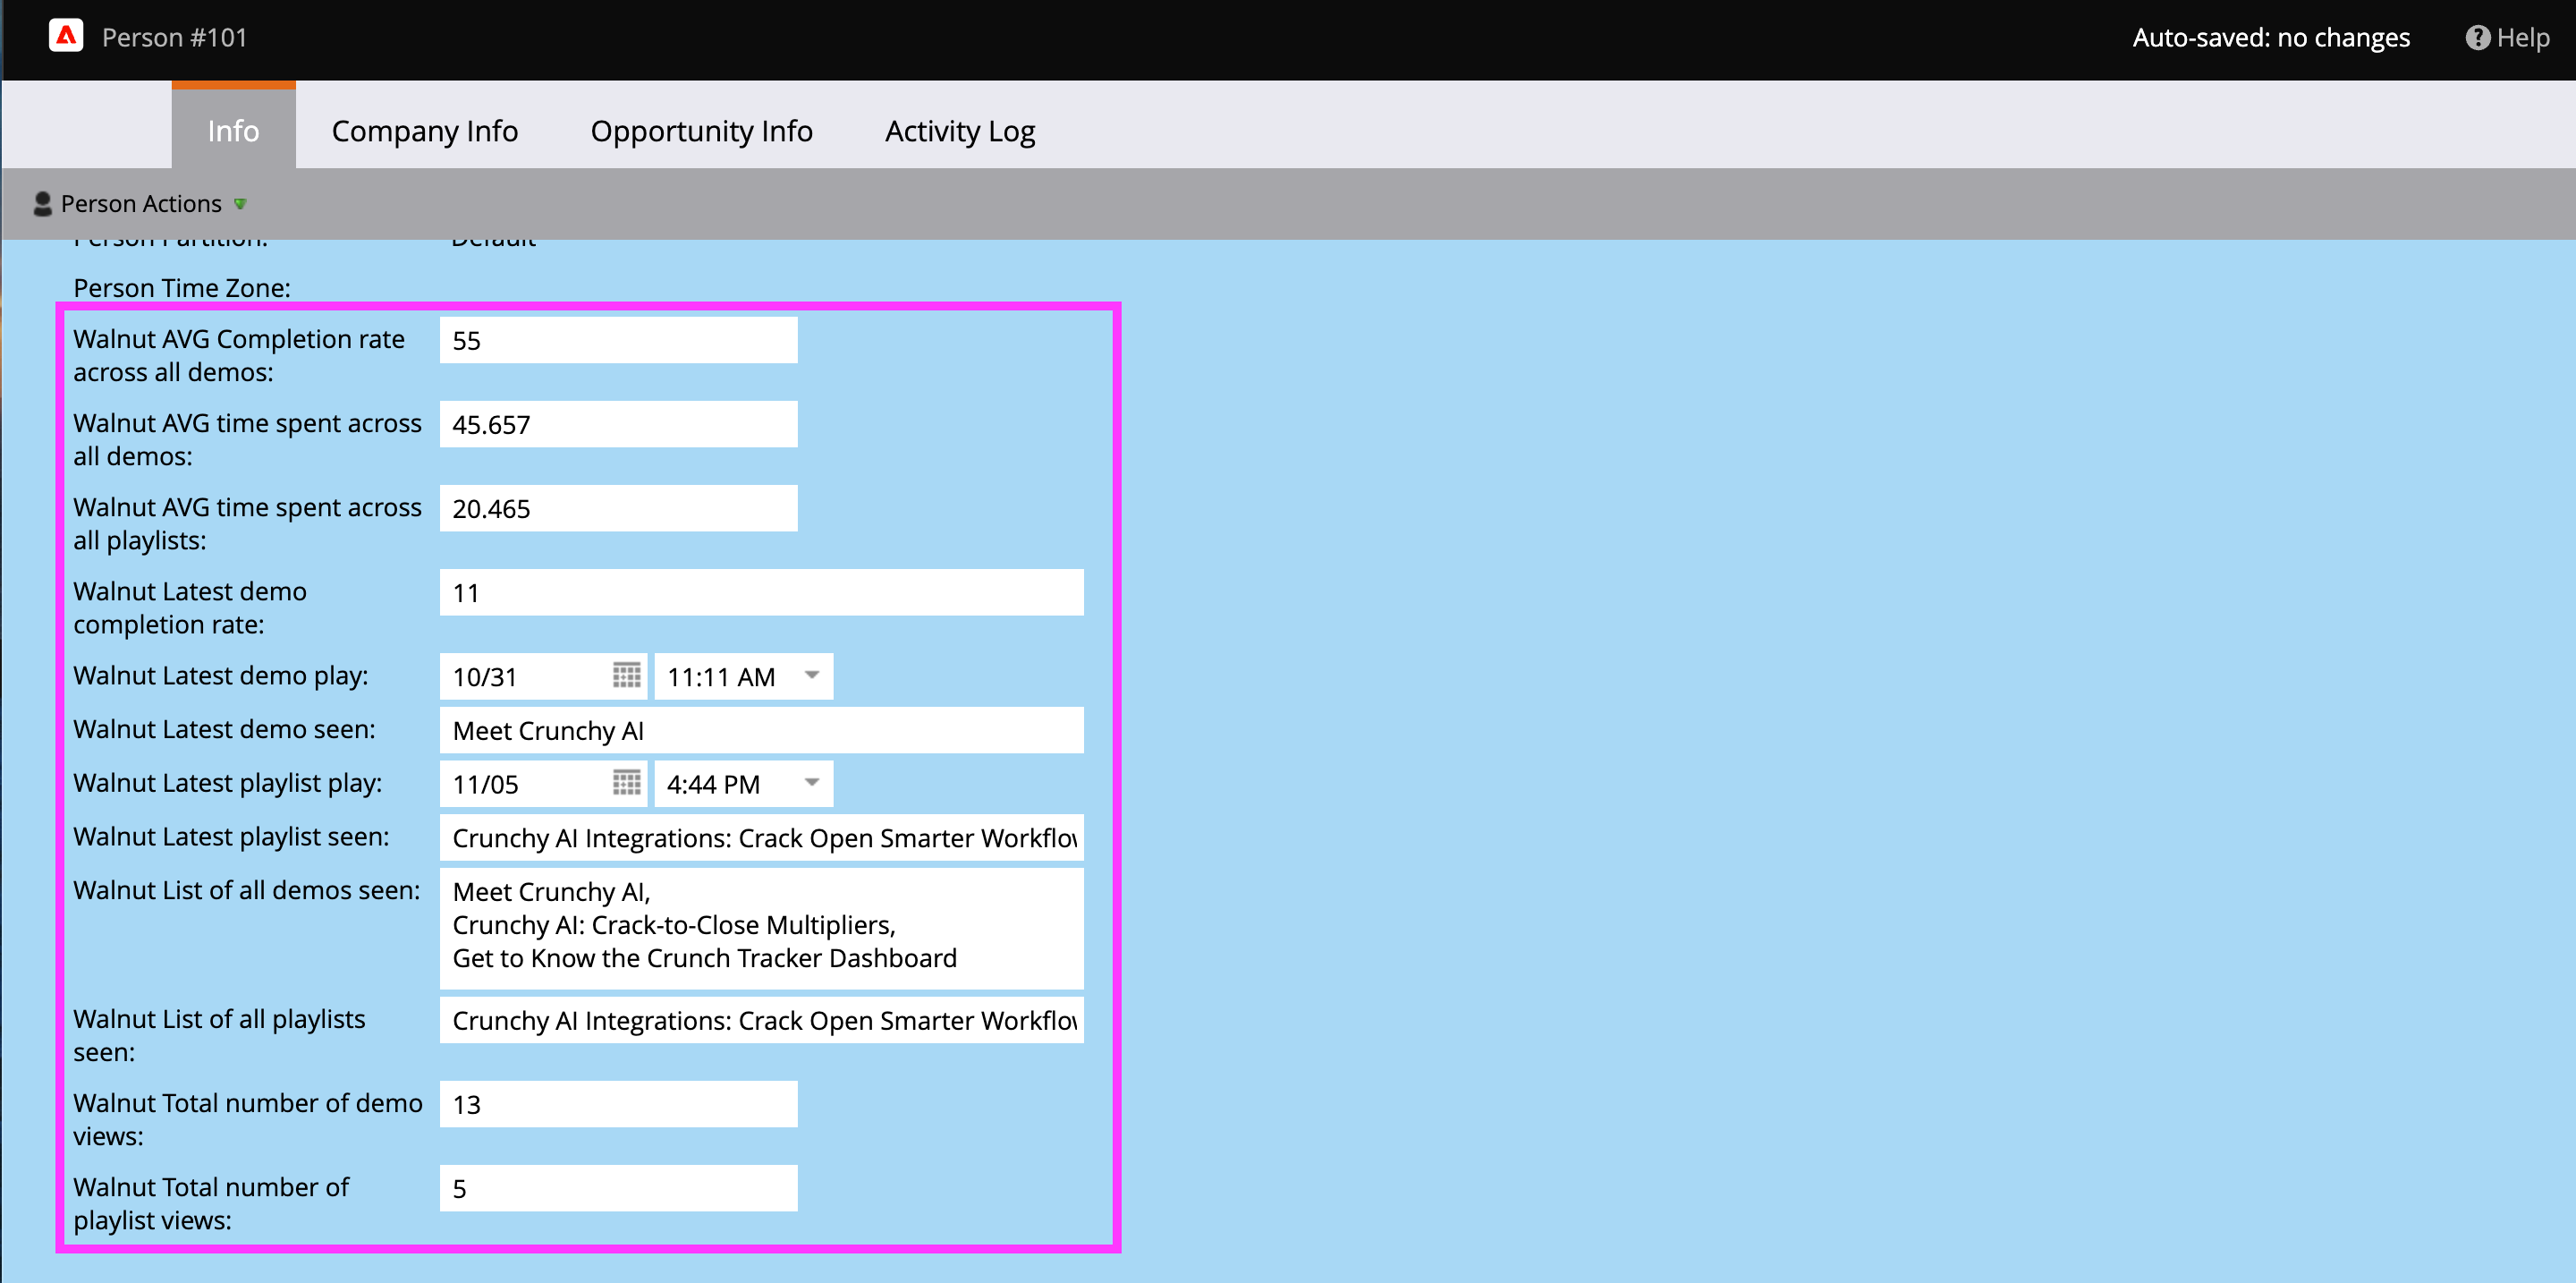
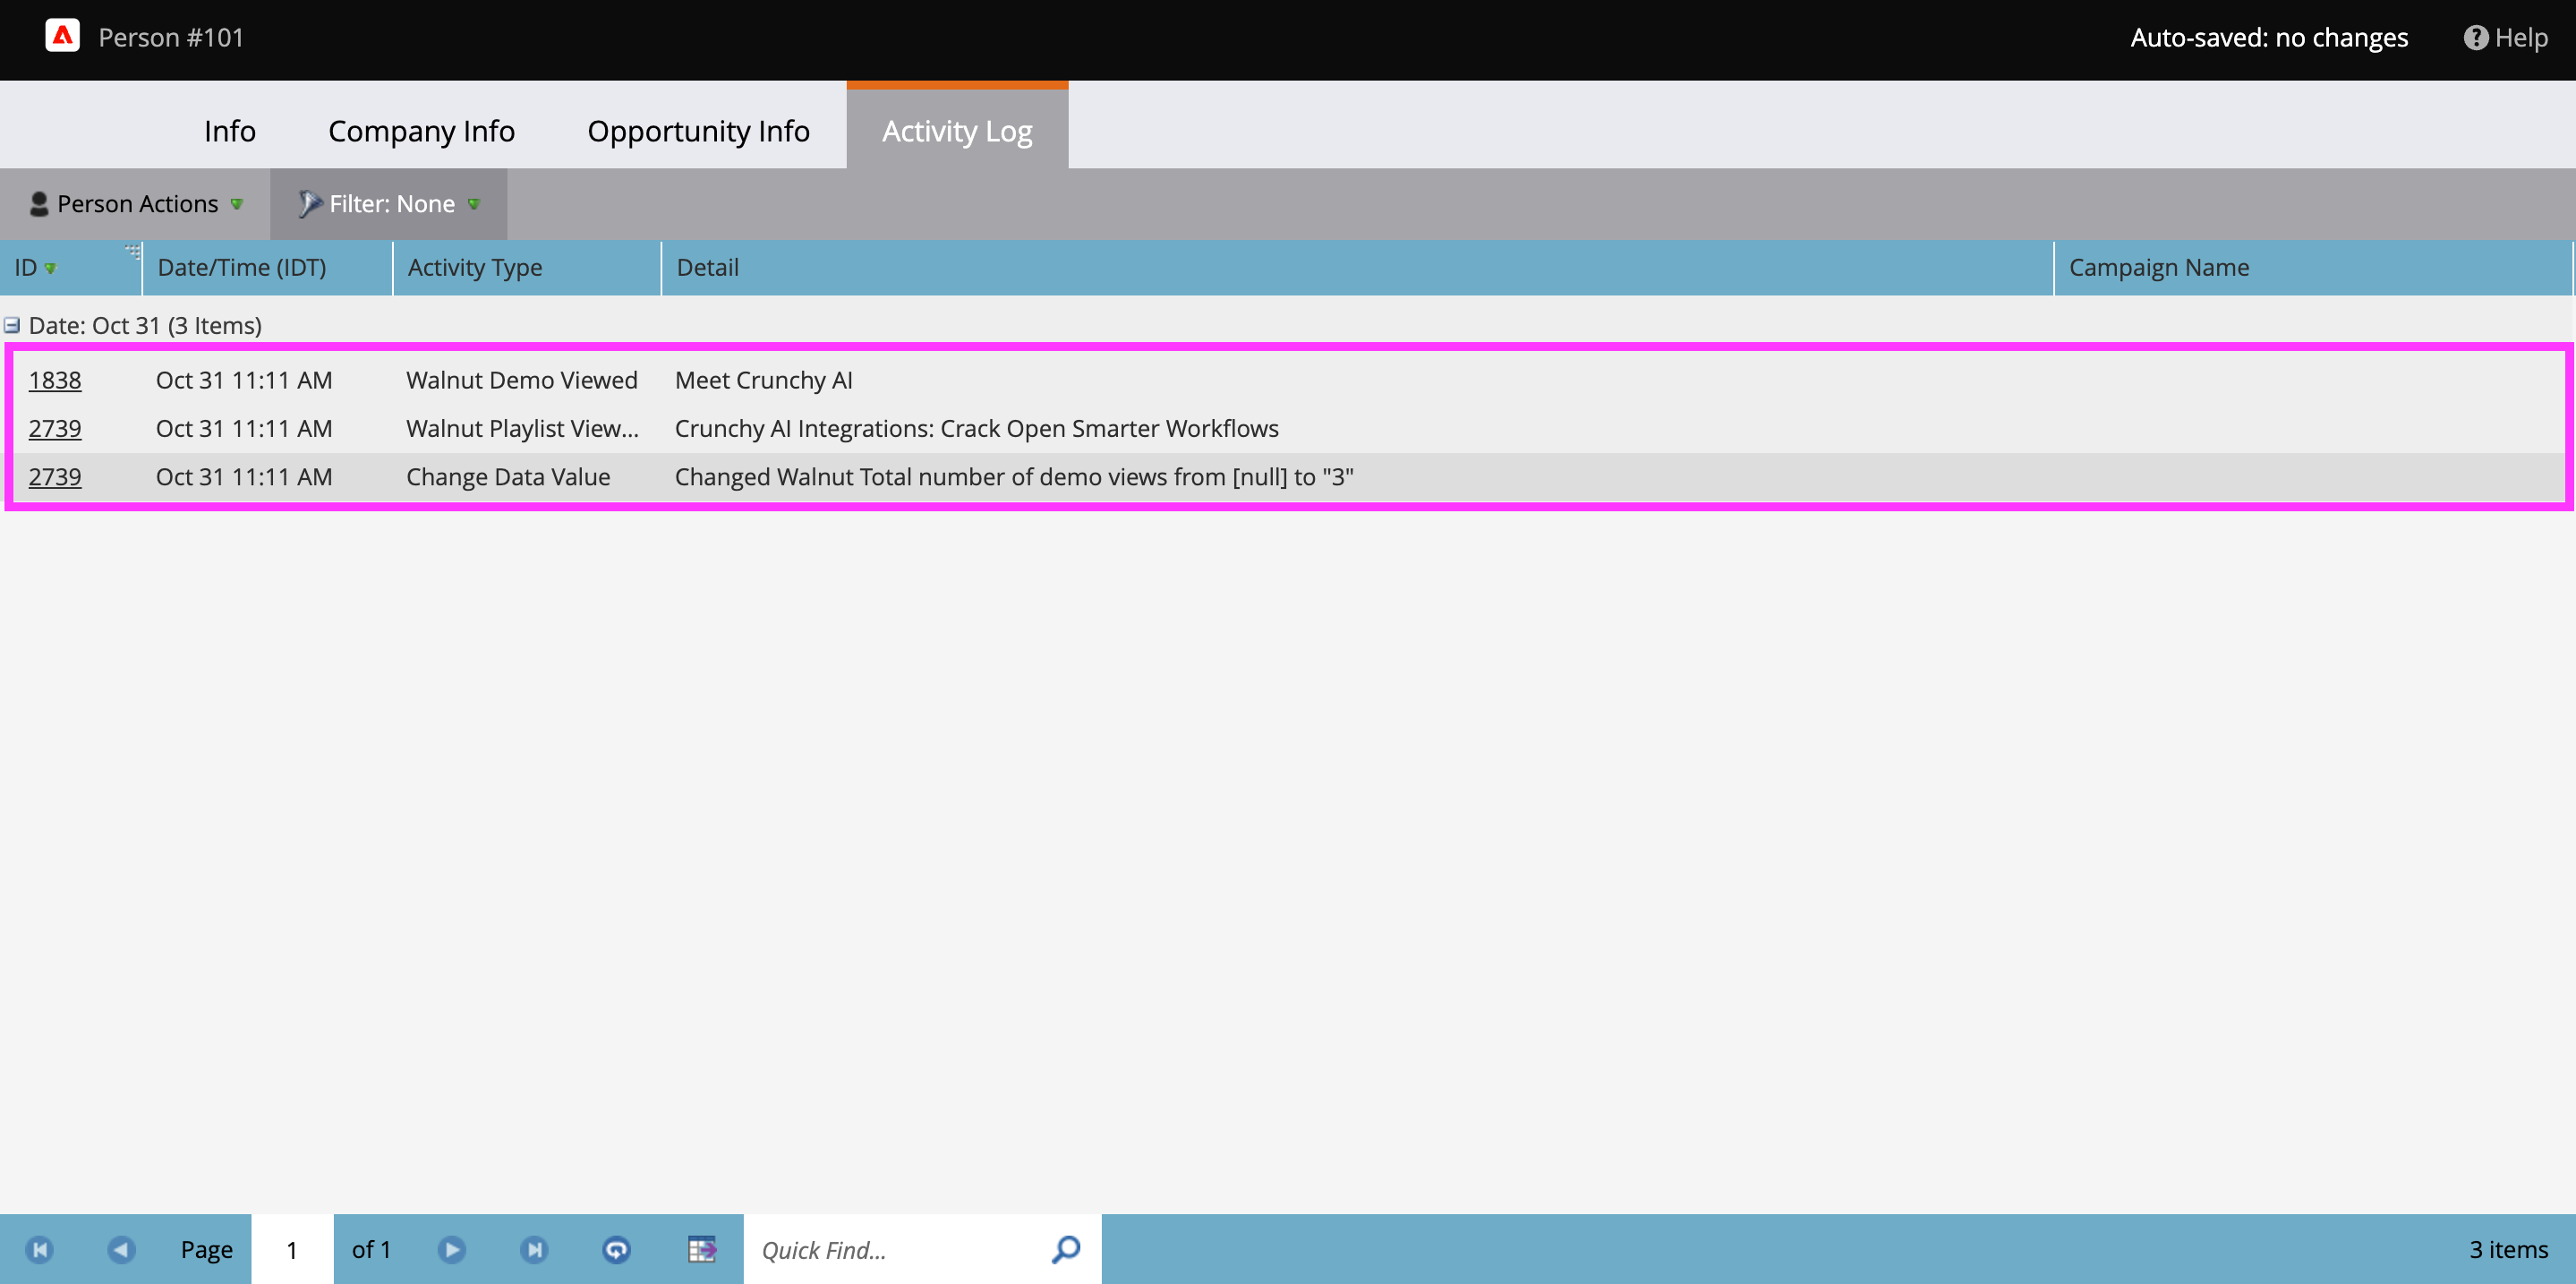
Once connected, Walnut automatically creates and populates custom fields in Marketo, visible under Person → Info. You’ll also see Walnut Demo Viewed, Walnut Playlist Viewed, and Change Data Value activities under Person → Activity Log, containing enriched session-level data and updates to Walnut-related fields.
- The custom fields appear under Person → Info, providing a snapshot of overall Walnut engagement.
- Under Person → Activity Log, you’ll find:
- Walnut Demo Viewed and Walnut Playlist Viewed activities containing enriched session-level data.
- Change Data Value entries reflecting updates to Walnut-related fields.
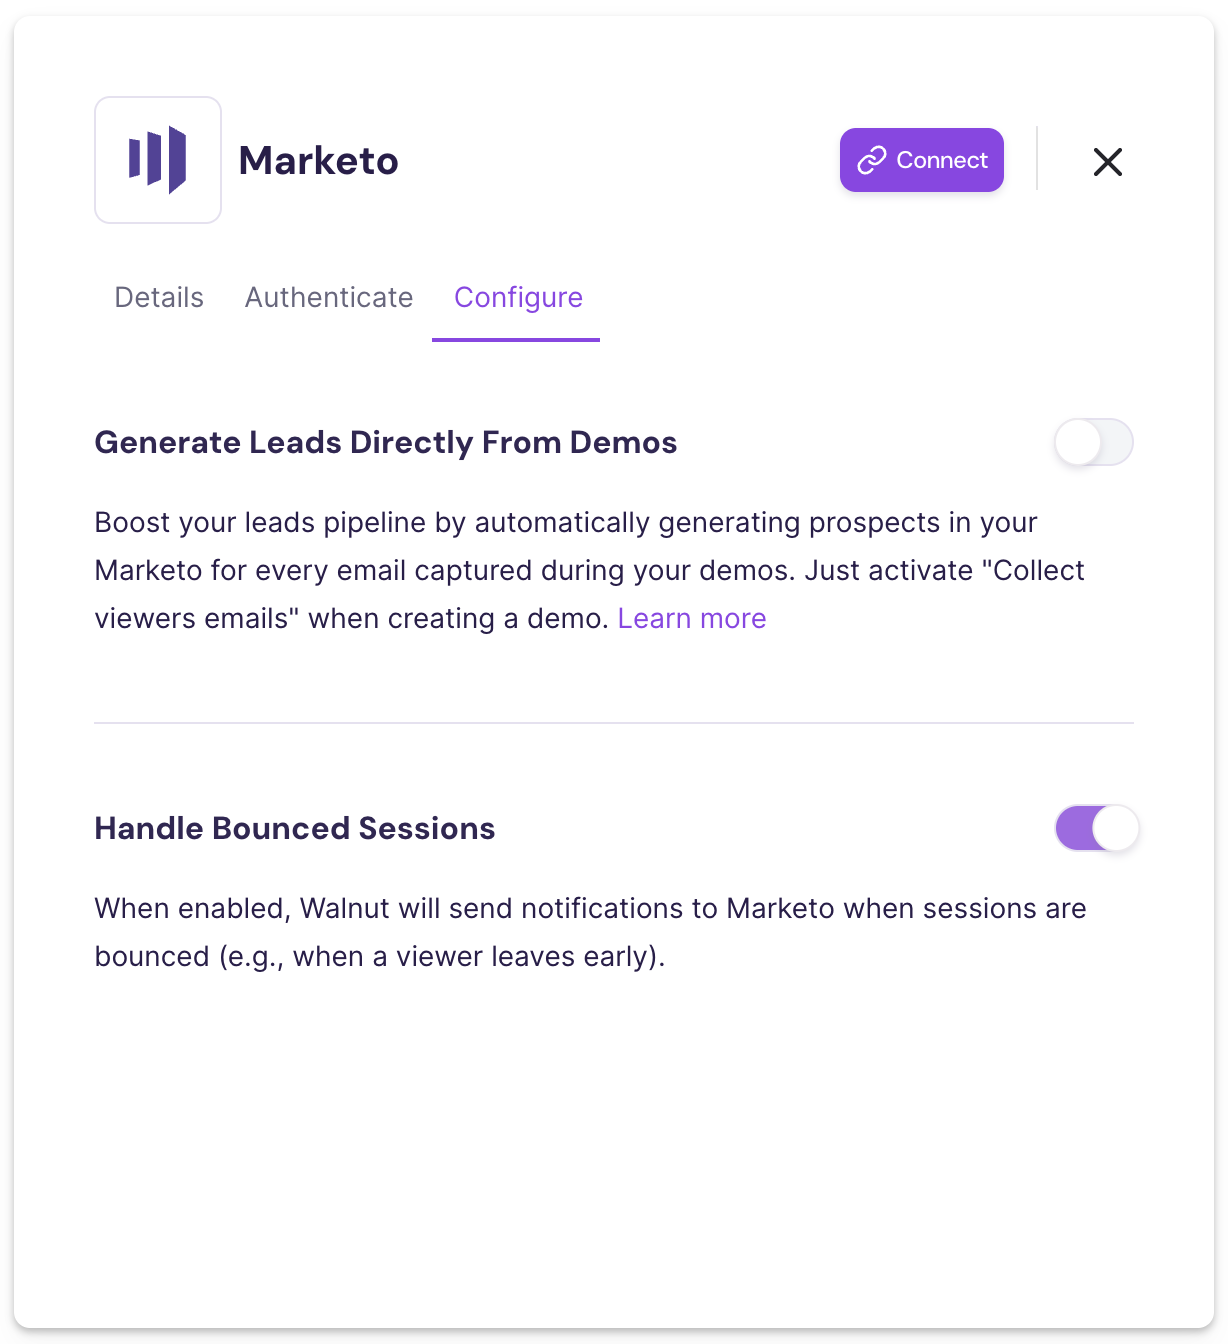
Optional Configurations
Once your Marketo account is connected, open the Configure tab to control how Walnut sends data to Marketo.
There are two optional configurations available:
Generate Leads Directly From Demos
This setting allows you to use a built-in Walnut email gate instead of a lead form, enabling leads to flow directly into Marketo as soon as viewers submit their email. To enable this feature, toggle Generate Leads Directly From Demos on, and make sure “Collect viewers’ emails” is active in your demo settings.
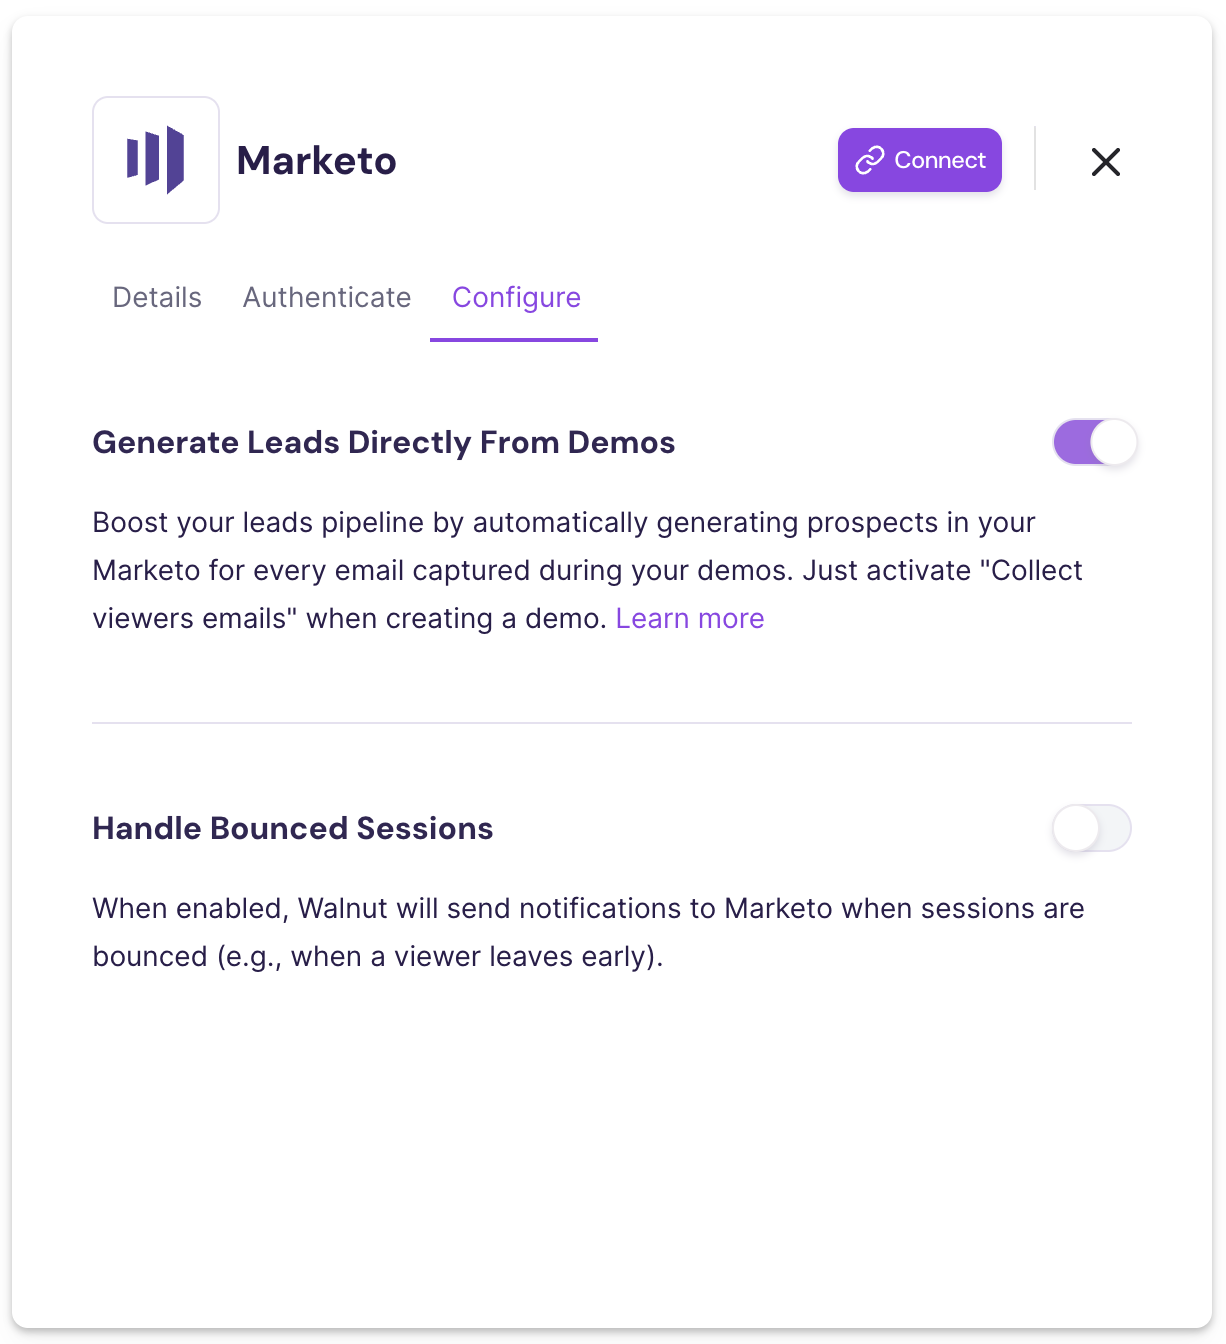
Handle Bounced Sessions
When enabled, Walnut will send a notification to Marketo if a session is bounced (for example, when a viewer opens a demo but leaves before engaging). This helps your marketing automation workflows accurately track low-intent or incomplete sessions.