Add personalized welcome messages
Customize the welcome message on a demo email gate in Demo preferences > Demo opening screen: edit the text, show your avatar, and pick branded or neutral colors.
Add personalized welcome messages
Say hey your way 👋—add a personal touch to your demo email gate with a custom welcome message.
-
Edit the welcome message text to say it your way ✍️
-
Match colors to your guides or brand 🎨
-
Add your avatar to bring a friendly face to the experience 🧑💻
How It Works
- In your library, open the demo's three-dot menu and select Demo preferences.
- Open Demo opening screen. The welcome screen appears only when Collect viewer emails is on.
- Under Welcome screen, type your text in Welcome message. It saves when you click away.
- Turn on Show your avatar to include your image. It's taken from your template or company settings.
- Set Colors to Branded to use your template or company colors, or Neutral for a plain look.
- Click Preview next to Welcome screen to see the email gate the way viewers will.
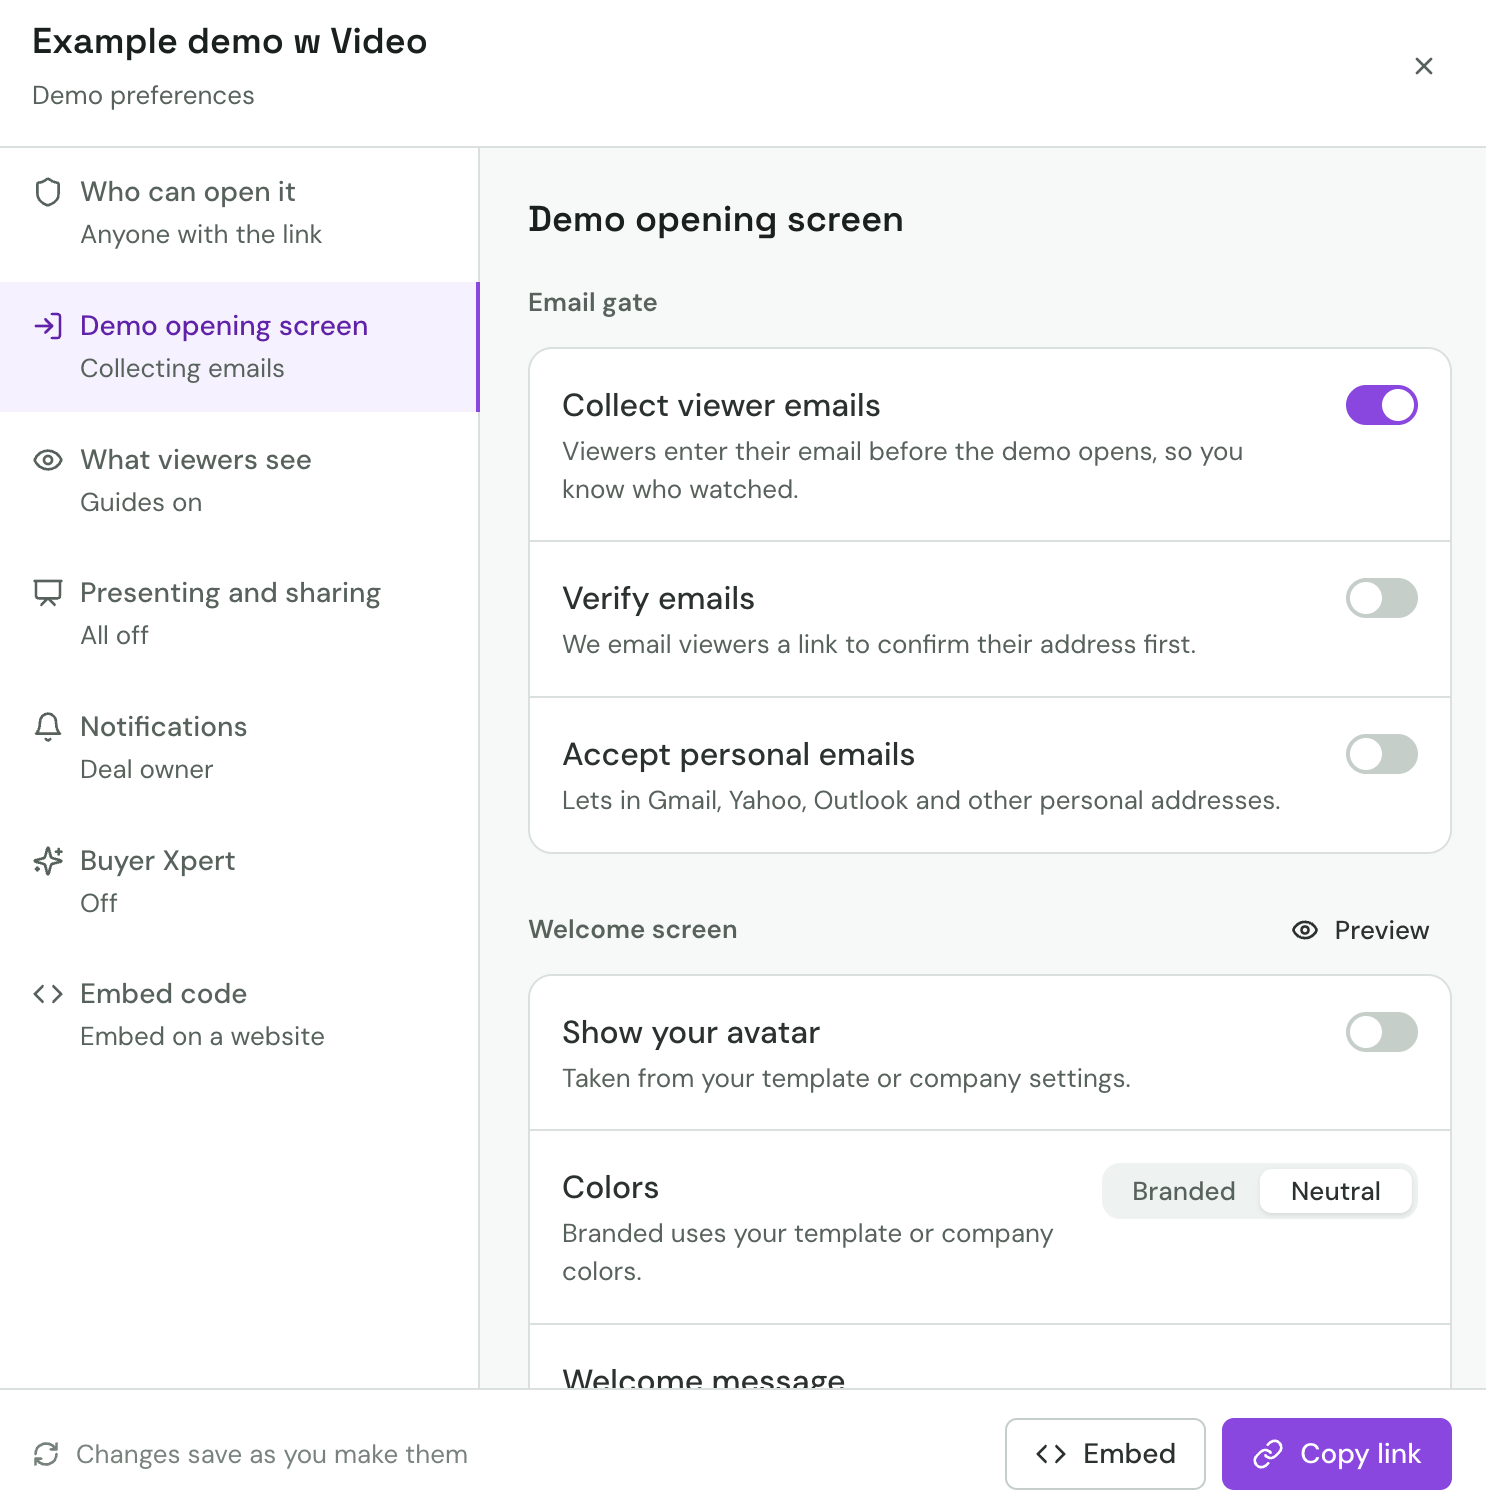
Every change saves as you make it. There's no Save button. For more on the modal, see Demo preferences.
Learn more about the demo email gate and Walnut Insights here.
Was this helpful?