Personalization variables overview
Personalization variables overview
Overview
Smart personalization in Walnut helps you tailor demo content automatically using dynamic variables, so each viewer sees a more relevant experience without requiring you to create a separate demo every time.
You can power that personalization using data from:
See Smart Personalization In Action
Before You Start
Before setting up smart personalization, make sure you have the right access and any required integrations in place.
Quick Start Guide
Smart personalization in Walnut follows a simple pattern: create the variable, choose the data source, then map the value.
The sections below walk through each step and then break down how personalization works for Salesforce, URL parameters, and lead forms.
Step 1: Set Up Your Variables
Variables act as placeholders inside your demo. Once mapped, Walnut replaces them with the personalized value pulled from your selected source.
-
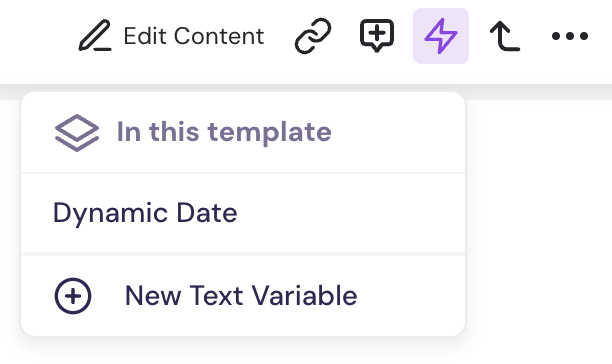
Select a text element in the Editor body, or highlight the portion of text you want to turn into a variable.
-
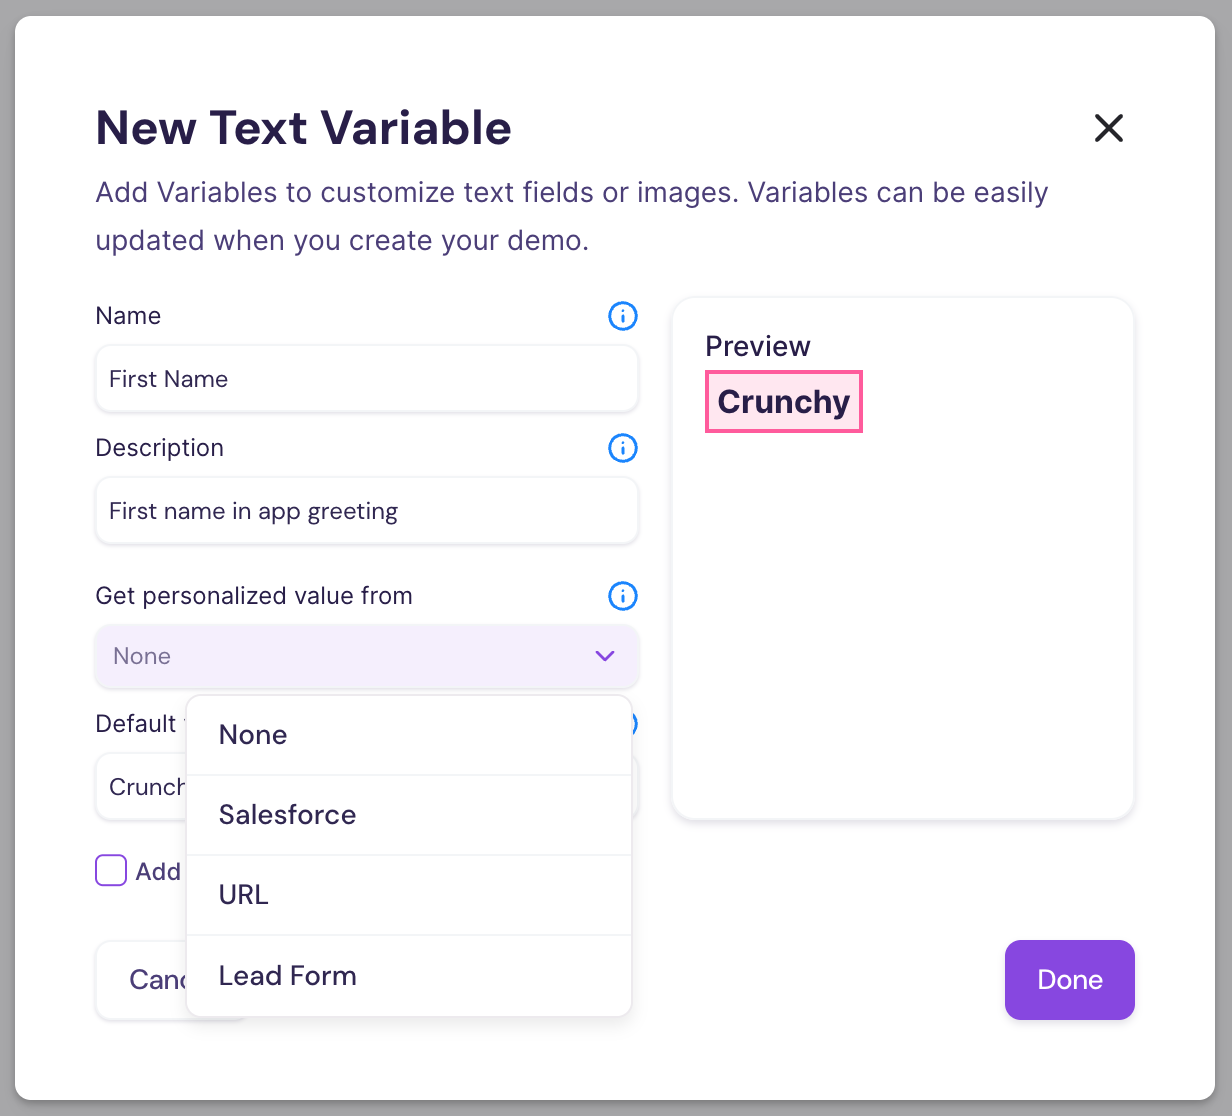
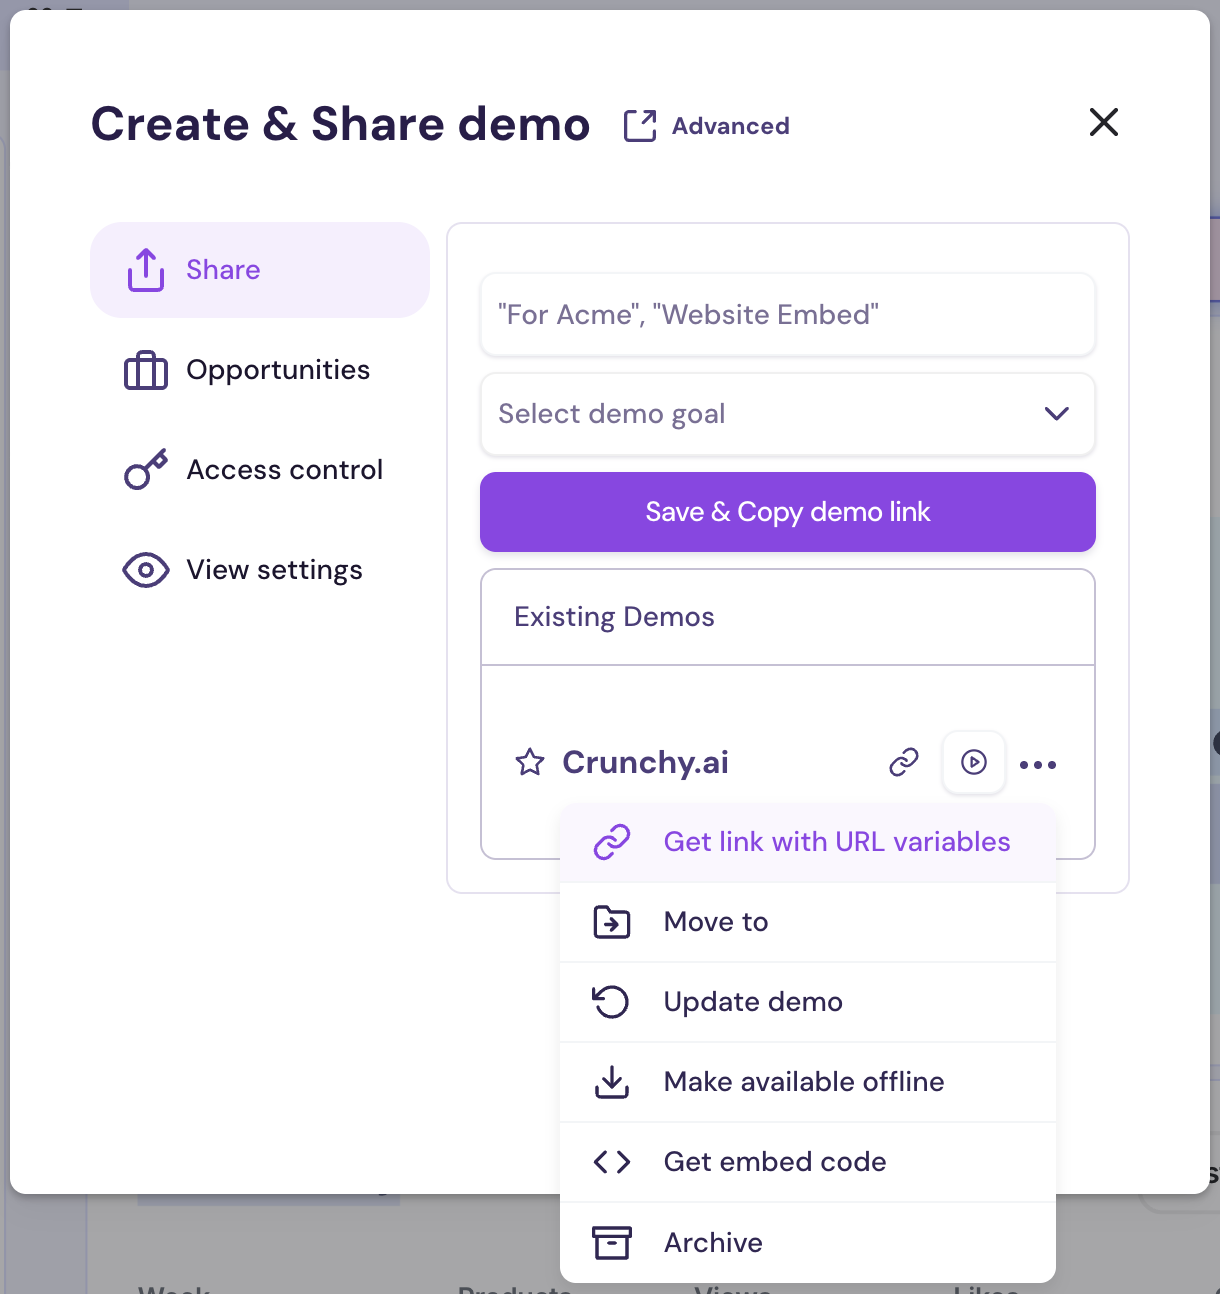
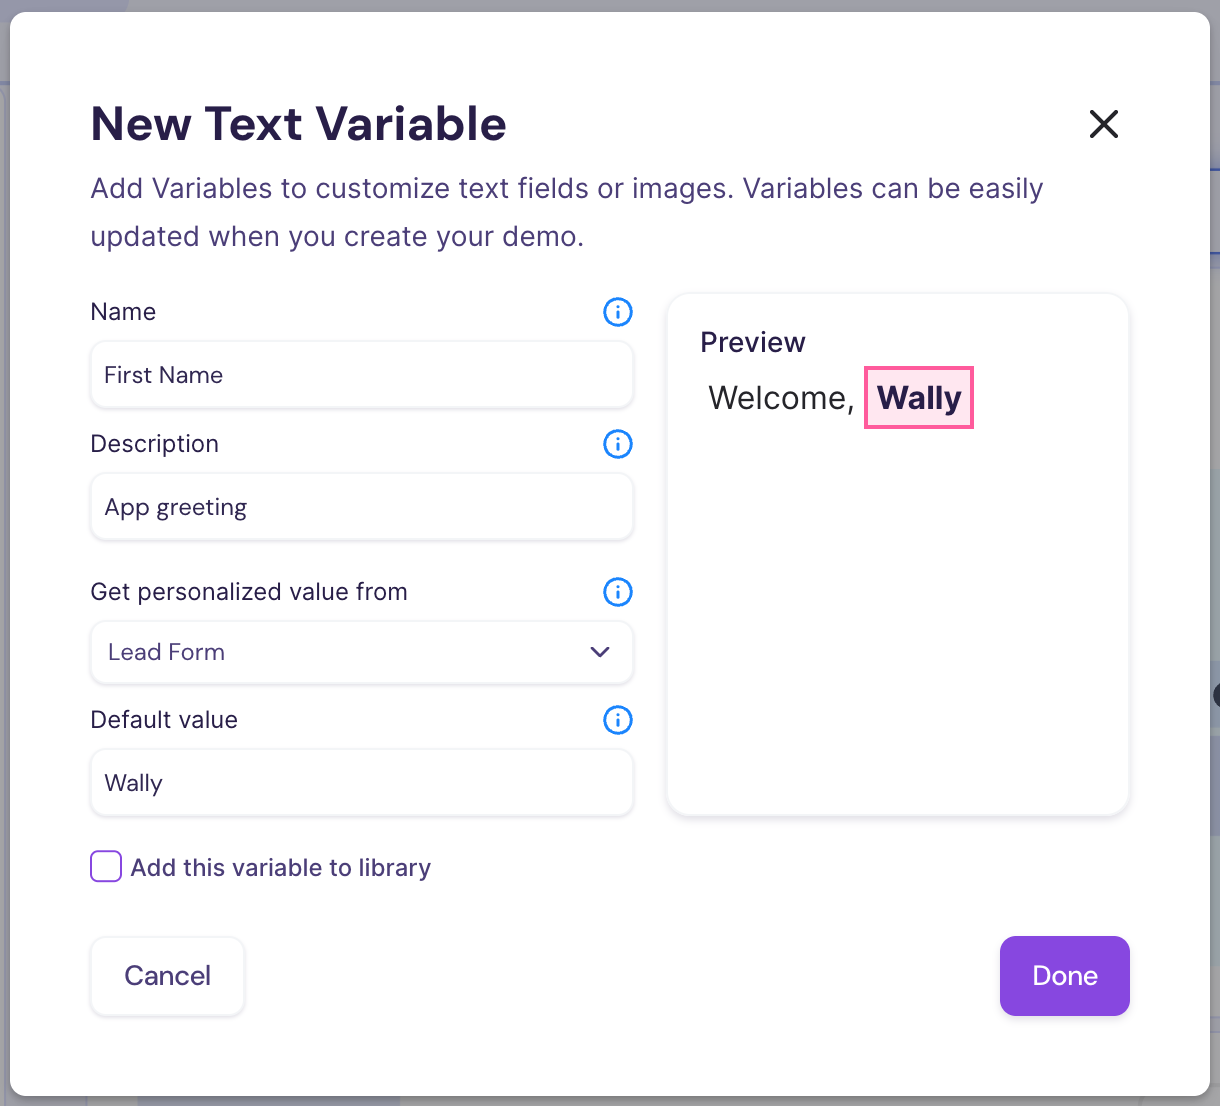
Click the Variables icon in the element editor toolbar and select New Text Variable.
-
Enter a name, description, and default value for the variable.
-
In the Get personalized value from dropdown, choose Salesforce, URL, or Lead Form, then click Done.
Step 2: Map Your Variable Values
Once the variable exists, the next step is deciding where Walnut should pull the personalized value from.
The setup will vary slightly depending on whether you are using Salesforce, URL parameters, or an in-demo lead form.
- Get Personalized Values from Salesforce
- Get Personalized Values from URL
- Get Personalized Values from Lead Form
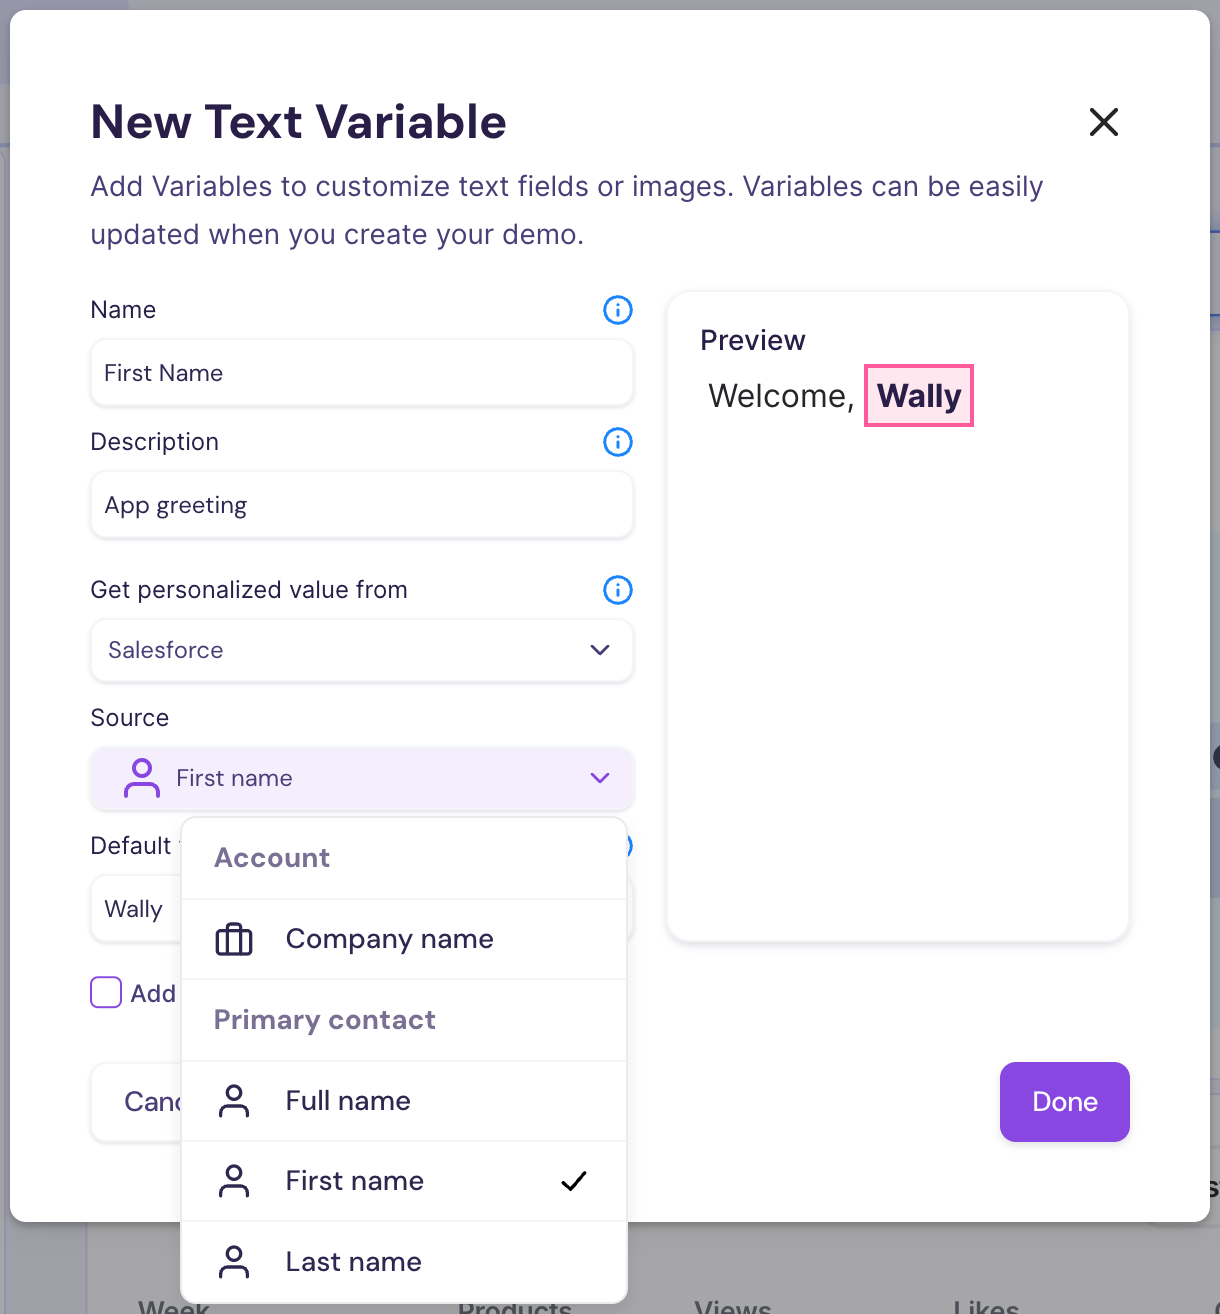
Get Personalized Values from Salesforce
Salesforce-based personalization is a strong option when you want Walnut to pull known CRM data directly into your demo experience.
- Create your variable and select Salesforce in the Get personalized value from dropdown.
- In the Source menu, choose the matching Salesforce field.
- Click Done to save the mapping.
Get Personalized Values from URL
URL-based personalization is one of the most flexible ways to personalize Walnut at scale. It allows you to pass values directly through the demo link, which makes it especially useful for outbound campaigns, email sends, and automated workflows.
When creating a new variable, select URL from the Get personalized value from dropdown.
This allows you to populate demo content using recipient or account-level data such as name, company name, company logo, and more.
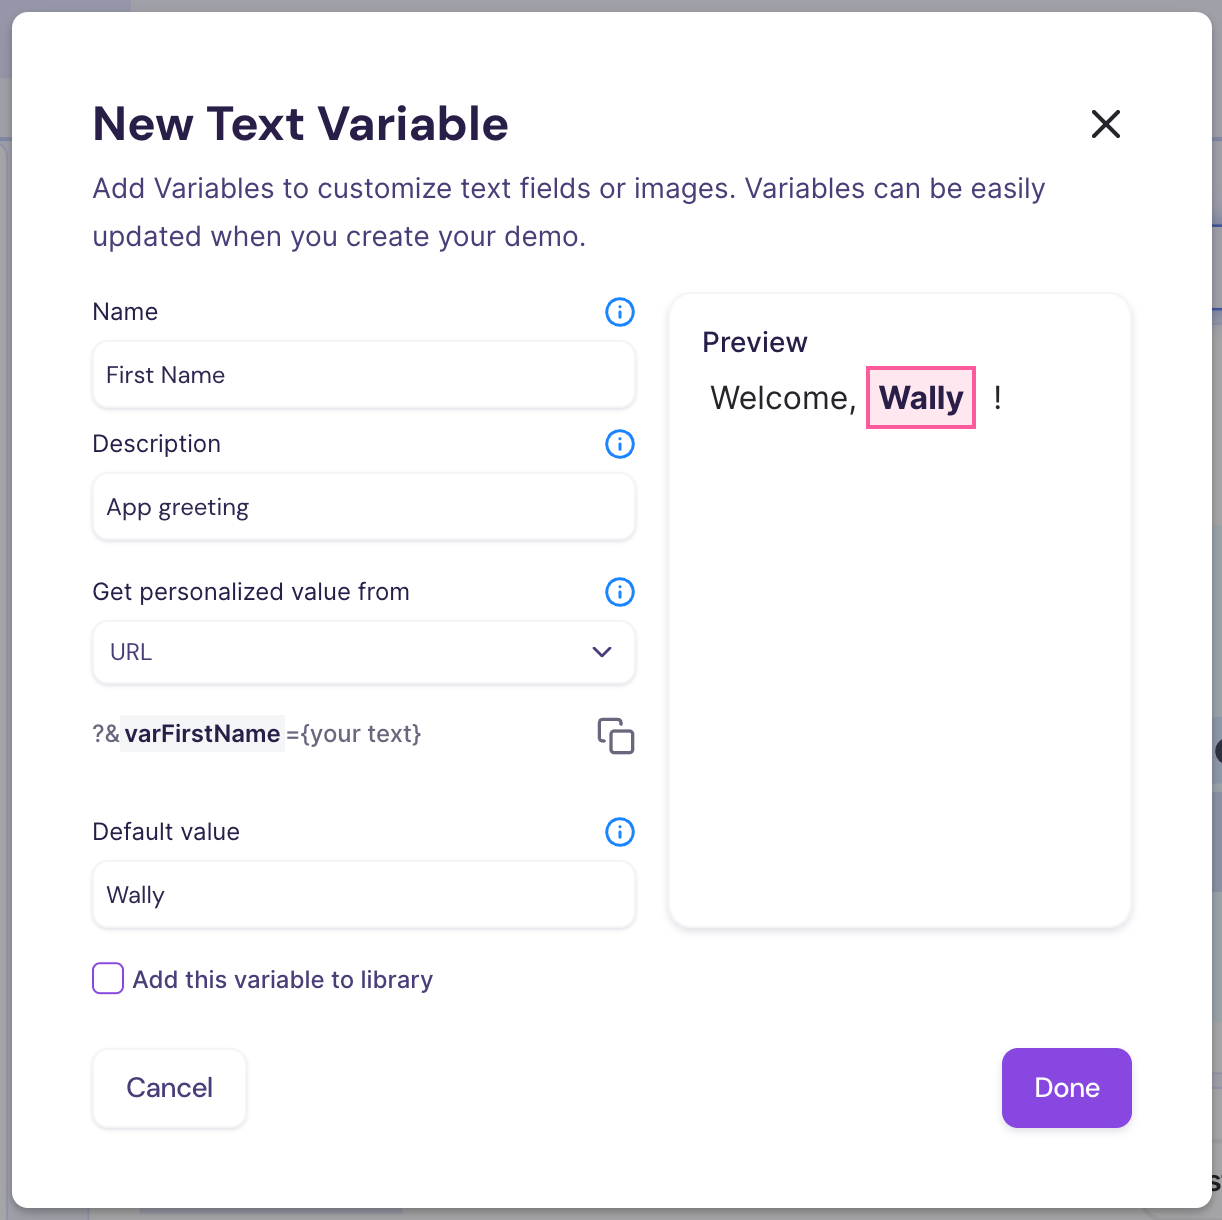
Walnut will show you how the query parameter should appear once added to your demo link. The same pattern can also be used for image variables.

After setup is complete, create and publish your demo. Once published, you’ll be able to copy the personalized link with URL variables included, or copy the base link without them if needed.
Get Personalized Values from Lead Form
Lead-form-based personalization allows Walnut to update the experience after a viewer submits information directly inside the demo.
This is especially useful when the viewer is not known in advance, but you want the demo to adapt once they identify themselves.
To get started, create a variable and select Lead Form as the source. Then embed a lead form into your demo.
Once the form is added, include variable mapping inside the form script so Walnut knows which submitted values should populate which variables.
Walnut supports multiple lead form providers. The examples below show how to pass submitted values back into Walnut variables:
- HubSpot: Use the form submission callback to map submitted field values into Walnut variables.
- Marketo: Use
form.vals()after a successful submission to send mapped values back to the demo. - Pardot: Listen for the form submission event and map the relevant field values into Walnut variables.
HubSpot Lead Forms
For HubSpot, Walnut variables are typically set when the form submission event fires and Walnut receives the submitted values.
Each variable should follow this structure:
'Variable Name in Walnut': data.submissionValues.internalname
Example:
<script charset="utf-8" type="text/javascript" src="//js.hsforms.net/forms/embed/v2.js"></script>
<script>
hbspt.forms.create({
  portalId: "8480797",
  formId: "1bd50726-ce9e-4180-b9bb-b9f846d554a2",
  region: "na1",
  onFormSubmitted: function($form, data) {
    window.postMessage({
      message: 'walnut-set-variables',
      variables: {
        'First Name': data.submissionValues.firstname,
      }
    }, location.href);
  }
});
</script>
Common HubSpot Field Labels
How to find exact field names in HubSpot:
1. Open your HubSpot form editor.
2. Click into the field you want to map.
3. In the left sidebar, find the Internal name. That is the value you should use in data.submissionValues.
Marketo Lead Forms
For Marketo, Walnut variables are usually passed back after form submission using values collected through form.vals().
MktoForms2.loadForm(
  "//app-xyz.marketo.com",
  "718-GIV-198",
  621,
  function (form) {
    form.onSuccess(function () {
      const vals = form.vals();
      window.postMessage(
        {
          message: "walnut-set-variables",
          payload: {
            'First name': vals.first_name,
            'Last name': vals.last_name,
          },
        },
        "*",
      );
    });
  },
);
Pardot Lead Forms
Pardot follows a similar pattern. Once the form is submitted, Walnut can receive the mapped values and apply them to the demo variables.
const formID = "#pardot-form";
const form = document.querySelector(formId);

form.addEventListener("submit", function (event) {
  window.postMessage(
    {
      message: "walnut-set-variables",
      payload: {
        "First name": form.first_name.value,
        "Email": form.email.value,
      },
    },
    "*",
  );
});