Create demo variables
Create demo variables
Overview
Walnut variables help you build once and personalize at scale.
Instead of duplicating templates or manually updating the same content over and over, you can convert specific text, images, avatars, or dates into reusable variables. This gives you a much more flexible way to tailor demos for different viewers, workflows, and use cases while keeping your template structure consistent.
Variables are one of the easiest ways to scale personalization in Walnut. They help teams reduce repetitive editing, keep templates cleaner, and adapt demos more quickly for outbound, follow-up, and customer-facing workflows.
Variable Types
Walnut supports four main variable types, each designed for a different type of personalization.
Add Text Variables
Text variables are the most flexible variable type in Walnut. You can use them to personalize on-screen content, guide text, product names, company names, contact names, and more.
There are a few different ways to work with text variables depending on your workflow:
- Create a brand-new text variable first, then apply it later
- Replace text with an existing variable
- Use Find & Replace to apply variables across multiple instances at once
- Create a variable while replacing text in the same workflow
Create a Standalone Text Variable
This workflow is useful when you want to create the variable first and decide where to apply it afterward.
To create a standalone text variable:
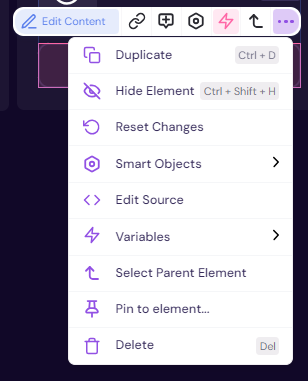
- Click any text element, or right-click a text element, to open the editing toolbar.
Click the Variables icon to open the variables options.
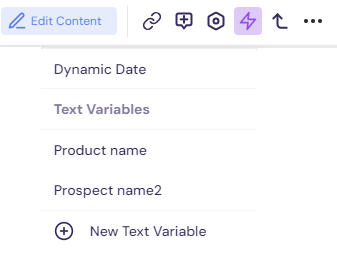
Click New Text Variable.
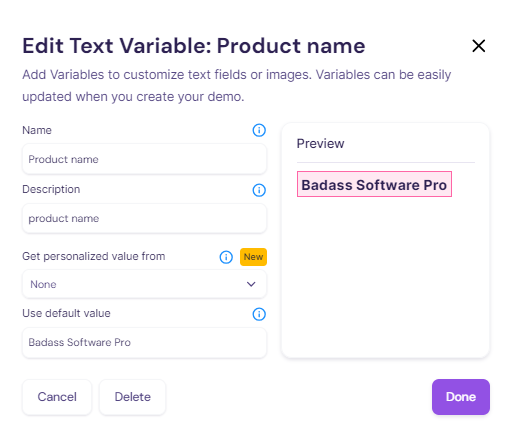
- Complete all required fields:
- Name: The label used for the variable
- Description: Helpful context for your team
- Get personalized value from: None, Salesforce, URL, or lead form
- Default value: The fallback text shown if no personalized value is supplied
- Click Done.
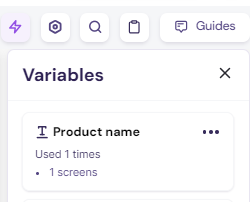
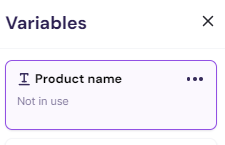
Open the Variables pane again to review where the variable is being used.
If you created the variable from a text element you did not actually want to change, you can restore that text afterward. The variable itself will still exist and can be applied elsewhere.
Replace Text with an Existing Variable
If the variable already exists, you can quickly replace a text element with it.
To replace text with an existing variable:
- Click the text element you want to replace.
- Click the Variables icon.
- Select the existing variable from the list.
- The selected text is replaced with the variable.
Use Find & Replace with Variables
Walnut’s Find & Replace tool helps you replace repeated text across a template much faster.
This is especially useful when the same product name, company name, or repeated phrase appears in multiple places and you want to convert all instances into a variable at once.
Replace Text with an Existing Variable Using Find & Replace
To replace a text string with an existing variable using Find & Replace:
- Open the template in edit mode.
- Click the parent element or screen where you want to search.
Click the Search icon from the editor subheader to open the Find & Replace pane.
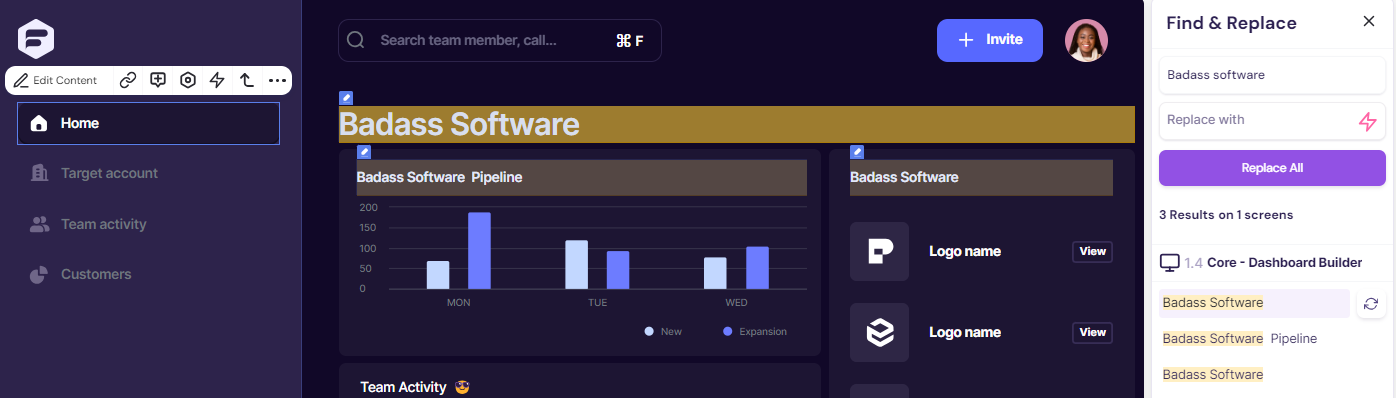
- Enter the text you want to replace.
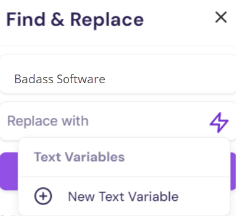
In the Replace with field, select the existing variable.
- Review the results.
- Click Replace All.
Confirm the action.
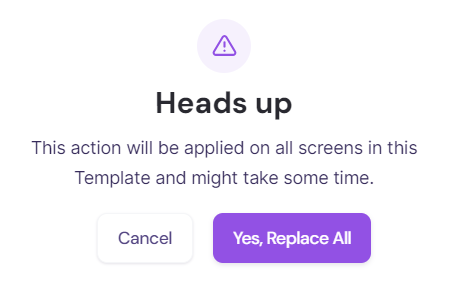
Once confirmed, all matching text is replaced with the selected variable.
Replace Text and Create the Variable at the Same Time
If you have repeated text in the template but have not created the variable yet, you can do both in one workflow.
To replace text and create the variable at the same time:
- Repeat steps 1 through 4 from the previous Find & Replace workflow.
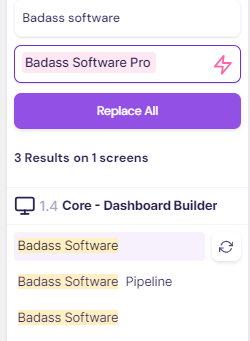
In the Replace with field, select New Text Variable.
Complete the variable setup window.
- Add the variable name, description, source, and default value.
- Click Done.
- Click Replace All.
Walnut creates the variable and applies it to all matching text in one step.
Replace Text Using a Personalized CRM Variable
This workflow is similar to creating a new text variable, but you must choose the CRM source during setup.
Depending on your connected source, available mapped values may include company name, full name, first name, or last name.
Add Image Variables
Image variables let you swap one image for another while keeping the rest of the template structure unchanged.
This is especially helpful when personalizing logos, product visuals, screenshots, or branded graphics across different demos.
To replace an image with an image variable:
Right-click the image and select Variables > New image variable, or click the Variables icon from the edit toolbar.
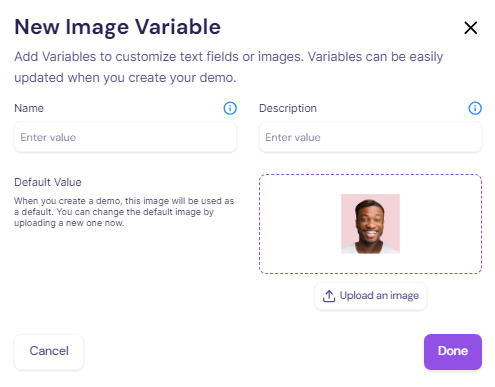
- Complete the variable details.
- Click Done.
Note: The selected image becomes the default value for the variable, but you can update it later by uploading a different image.
Add Dynamic Date Variables
Dynamic Date is a built-in variable that keeps date-based content current inside your demo.
It is useful when you want to show:
- today’s date
- tomorrow’s date
- yesterday’s date
- a date offset by days, weeks, or months
You can also control the date format, which makes Dynamic Date especially useful when building demos for different regions or formatting needs.
Add a Dynamic Date Variable
To add a dynamic date variable:
Open the template in edit mode and locate the text where you want the dynamic date to appear.

- Click Edit Content and place your cursor where the date should appear.
Click the Variables icon and select Dynamic Date.

Choose the date format and set the offset if needed.
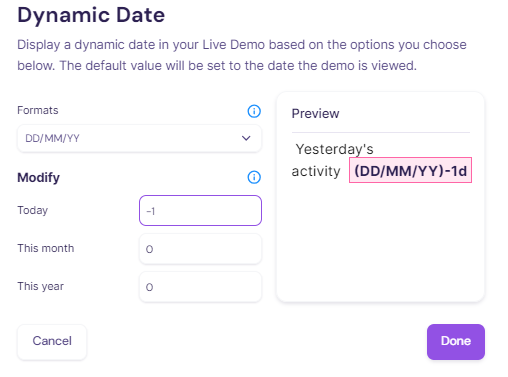
- Click Done.
In edit mode, a variable tag appears where the dynamic date has been added.
Remove a Dynamic Date Variable
To remove a dynamic date variable:
Select the dynamic date, click the Variables icon, and choose Remove Dynamic Date.
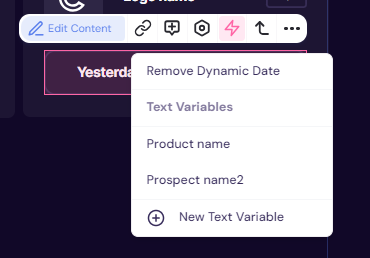
Alternatively, click the three-dot menu and select Variables > Remove Dynamic Date.
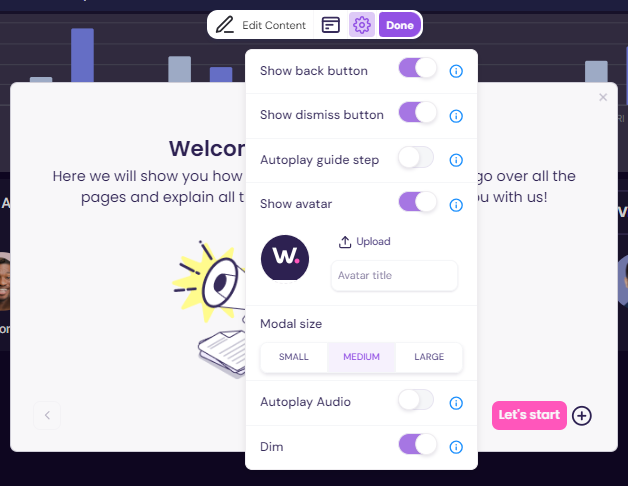
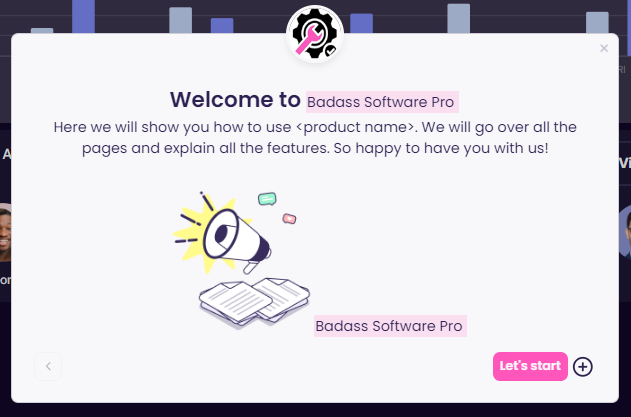
Add Avatar Variables
Avatars help personalize your guides and give them a more human, branded, or role-specific presence.
You can apply the same avatar across every guide in a template, or choose different avatars for selected guides.
Add the Same Avatar to All Guides
To add the same avatar to all guides:
- Open the template in edit mode.
From the right-hand toolbar, click the Guides icon to open the Guides pane, then click the gear icon.
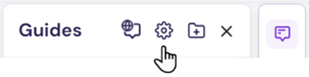
Select Avatar and upload the new image.
- The new avatar is applied across all guides in the template.
Add or Change an Avatar on Selected Guides
To add or change an avatar on selected guides:
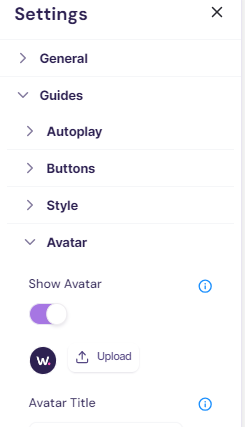
Open the template in edit mode, then click the Guides icon from the right-hand toolbar.
- Select the guide you want to update.
Click the guide pane highlight area to open the guide editing toolbar.
- Click the Settings icon and upload a new avatar.
The new avatar is applied only to the selected guide.
Repeat this process for any other guides where you want a different avatar.