GatedContent lead forms
GatedContent lead forms
Overview
Use this setup guide to embed your GatedContent lead forms directly in your Walnut demos. This setup enables Walnut to automatically capture email identification, and sync it across your integrations and analytics for deeper engagement tracking.
Once configured, your GatedContent form displays seamlessly inside the demo, and each submission identifies the viewer in Walnut Insights for enriched session and lead reporting.
Setup at a Glance
- Copy the starter script provided below.
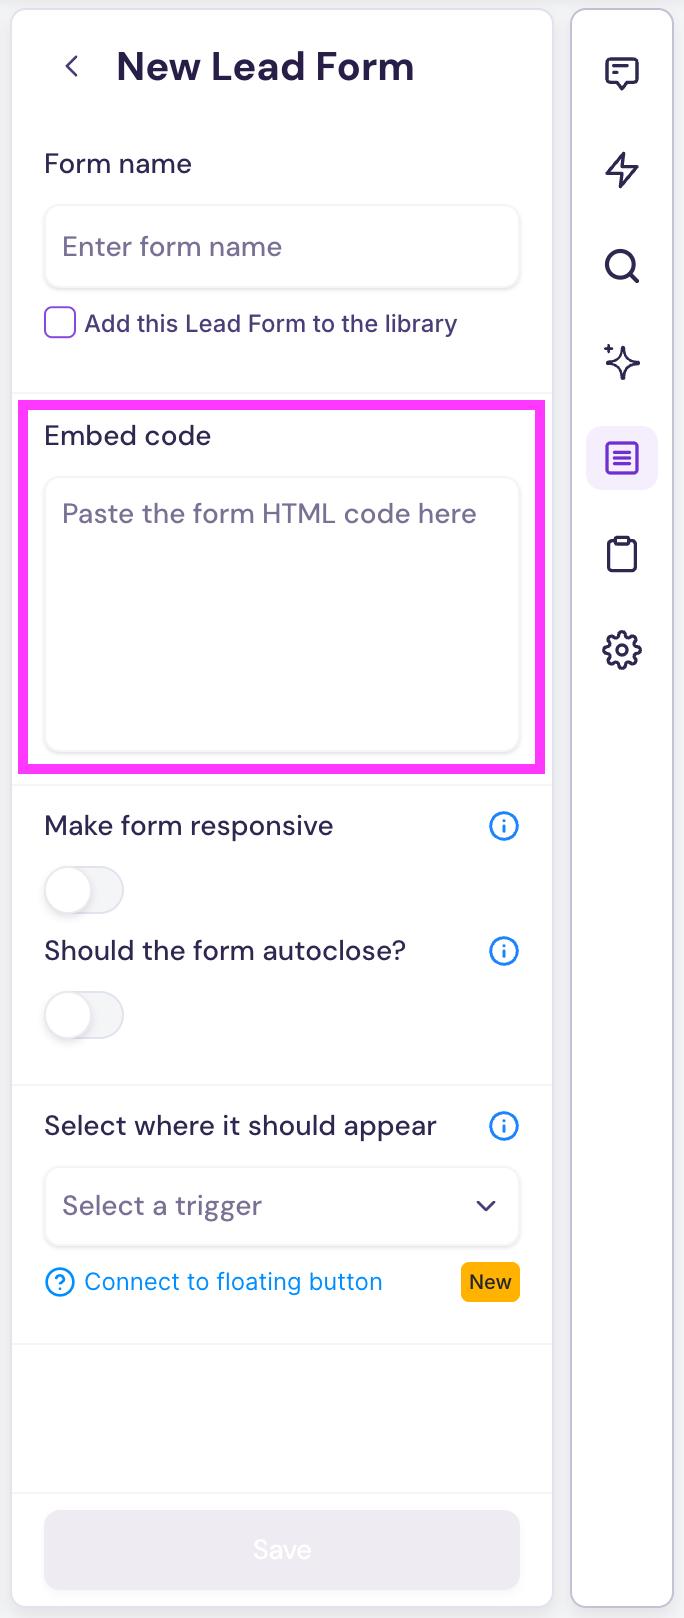
- Paste the starter script into the Embed Code section of your template.
(Template → Forms → Create Lead Form → Embed code) - Insert your unique GatedContent snippet and gate ID where indicated.
- Save your form and publish your demo.
Configure Your Form Script
Step 1: Copy & Paste the Starter Script in Your Walnut Template
Copy the following starter script and paste it into the Embed code section of the Forms panel of your template. (Template → Forms → Create Lead Form → Embed code).
* This starter script acts as the framework for your GatedContent form integration with Walnut. You’ll insert your own GatedContent code snippet and gate ID into the indicated sections.
GatedContent Starter Script
Copy
/* ---------------------------------------------------------------------------
   STEP 3b: Add your Gate ID below. Replace the Xs with your unique Gate ID 👇
   --------------------------------------------------------------------------- */

<div></div>
Step 2: Locate Your GatedContent Form Snippet
- Your GatedContent form snippet should look something like this:
<div class='gate-00000000-0000-0000-0000-00000000d000'></div>`
Step 3: Insert Your Unique GatedContent Code into the Starter Script
-
Copy the code between your `` tags in your unique GatedContent snippet. (*Do not include the tags themselves.)
-
Paste that portion into the STEP 3a section of the starter script in your Walnut template.
Paste your code below the line that says:
// ↓↓↓ Paste your GatedContent script below this line ↓↓↓ -
Copy your Gate ID (for example,
gate-00a0dc0c-00de-000f-afc0-0e000000d000) and replace the placeholder Gate ID in the final<div>line of the starter script.This section is labeled STEP 3b: “Add your Gate ID below. Replace the Xs with your unique Gate ID 👇”.
-
That's it! Finish configuring your form in the Forms panel — adjusting options such as settings, placement, and autoclose behavior as needed for your demo.
-
Once configured, save your changes and publish a demo to test your form.
Step 4: Test Your Form Setup
Once your script and Gate ID are in place, you’re ready to test your form submissions.
- Publish a demo containing the form.
- Open the published demo in an incognito or private window and submit a test entry through your GatedContent form.
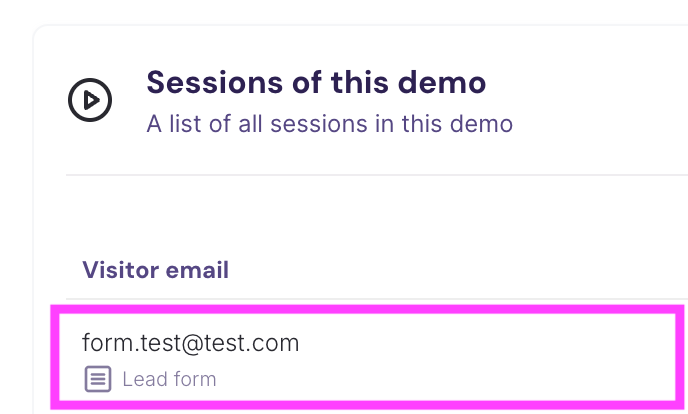
- Verify that the form submission is successful and check Walnut → Insights → Demo → Sessions of this demo to confirm that the email submission is captured.