Story Capture
Record live voice narration with Story Capture in the Walnut Extension, and let GenAI build a guided demo in minutes. Also covers recording dropdowns, menus and dialogs as screen states.
Story Capture
About This Feature
Story Capture is a GenAI-powered capture mode in the Walnut Extension, designed to jumpstart your guided demo creation process. With integrated voice capture, Story Capture enables creators to record real-time narration while capturing HTML content.
Using advanced GenAI, Story Capture transcribes your narration and intelligently pairs it with captured screen content and interactions—automatically generating a polished, step-by-step guided demo within minutes.
Snapshot 📸
- Feature Status: Core Feature (included in all Walnut subscriptions)
- Role Access: Admin, Editor
- Location: Walnut Extension
Key Features
- GenAI-powered capture mode with integrated voice recording for lightning-fast guided demo creation.
- Flexible guide generation — generate guides from captures with or without voice narration. *If voice narration is not recorded, guides are created based on the content of captured screens.
- Create engaging guided experiences like training walkthroughs, onboarding flows, and post-call follow-ups — with minimal setup and editing required.
- Record a screen's states — dropdowns, menus, popovers, side panels, dialogs and hover menus are captured on the current screen, so the demo opens each on click or hover without a new screen for each one.
Note: While Story Capture helps create polished demos quickly, some autogenerated content may require light editing or cleanup after creation to ensure it aligns perfectly with your messaging.
Quick Start Guide
- Open the Walnut Extension from your browser's toolbar.
- Your browser window will refresh, and a debugger banner will appear at the top. This banner is there to help and should be kept active during your entire capture session.

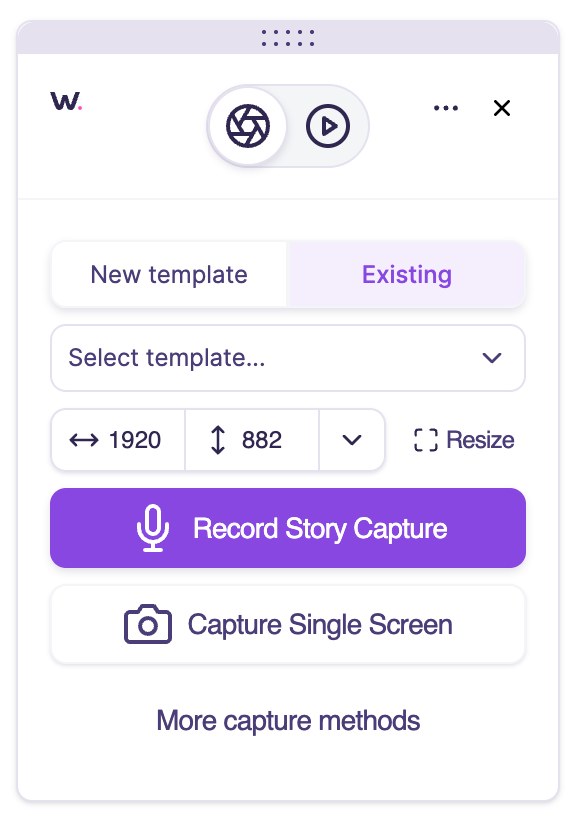
- Choose an existing template or create a new one, and click Record Story Capture to activate Story Capture mode.
- When prompted, allow your browser to use your microphone.

- Click Start Recording to begin your Story Capture session.

- Navigate through your platform just like a live demo, highlighting key features, workflows, and important areas.
- As you capture, right-click any element that you would like to annotate with a guide step. Emphasized elements will appear with an orange highlight and will be annotated in the guided flow.

- Once you've recorded your walkthrough, click Done to finish your Story Capture session.

- Open your template with the Edit your template button and select Create my story for me in the demo-builder pop-up.

- You can also create auto-guides with or without audio narration directly from the Guides panel at any time.

Pro Tip 👑
No need to make it perfect! Story Capture won’t use your narration word-for-word, so it’s okay to pause or reword as you go.
Record states on a screen
While a Story Capture session is running, you can record the states a single screen can show — dropdowns, menus, popovers, side panels, dialogs and hover menus — so the Demo opens each one on click or hover instead of creating a new screen for each. A click or hover belongs to the button, link or menu item that triggers it, so the hotspot in the Demo covers the whole control.
- In the Story Capture toolbar, click Record states (or press its keyboard shortcut — Alt + S on Windows, Option + S on Mac, which can be changed or cleared in Chrome's shortcut settings).
- The page gets a purple frame while states are recording, so it's clear clicks are no longer taking screenshots.
- Open what you want to show (a dropdown, menu, popover, side panel, dialog or hover menu), then close it the way a viewer would — its X, Cancel, or a click outside. Repeat for each state on the screen.
- Click Record states again (or press the shortcut again) to stop. A toast confirms how many states were added to the screen.
Navigating to another page ends states mode automatically. Each state stays attached to the screen it was recorded on, and is replayed in the Demo when a viewer clicks or hovers the control that opened it.
FAQs
What kinds of states can Story Capture record on a screen?
- Dropdowns, menus, popovers, side panels, dialogs and hover menus opened on the current screen. Each is attached to the screen it was recorded on, and opens on click or hover in the Demo without a new screen being created.
Can I generate AI guide steps without using Story Capture mode?
- Yes! You can generate AI-based guide steps for any screens captured using the Walnut Extension (all capture modes). If using Story Capture mode, spoken narration is transcribed and incorporated into the generated guide content—adding additional context and clarity. If you capture screens without spoken narration, Walnut’s GenAI will generate guide steps using on-screen context and content alone.